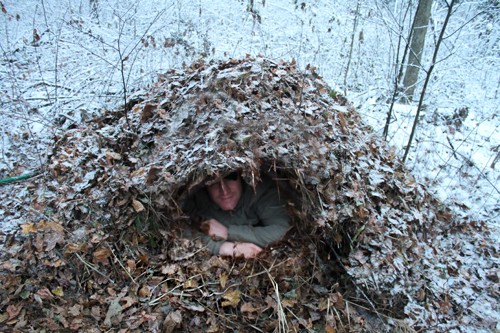
A major benefit to building a debris hut is that you don't need to spend an extended period of time searching for building material. If you're outdoors in the woods, try to avoid the beautiful scenery surrounding you and focus on the ground. Dead leaves, wood, branches, etc. So to put it in simple terms: If it's living, let it live. If it's dead… grab it!
Step 1: Find an area with lots of debris. As I mentioned before, this shelter is ideal for an area that naturally has a bunch of debris and woods. While this can be built in less than ideal locations, it will be well…less than ideal and take longer to build. Leaves, long grasses, pine-needles, and so on are all excellent for use with this type of shelter.
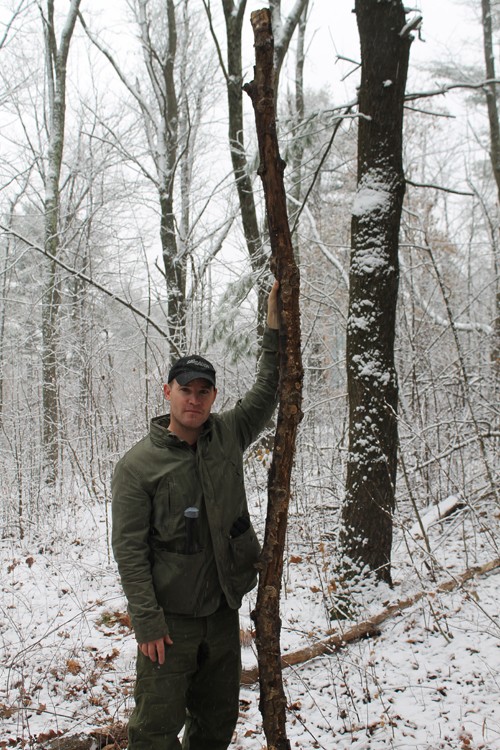
Step 2: Find a ridge pole almost twice as long as you are high. The straighter the better, however even a crooked one like this will be effective.
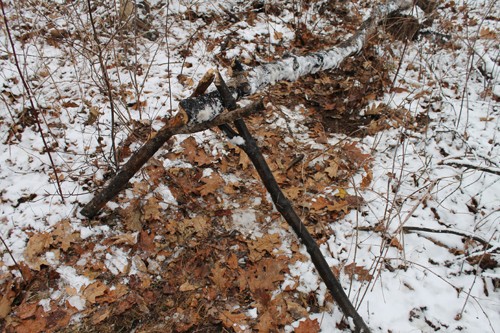
Step 3: Prop up the ridge pole. Using two “Y” shaped sticks, the next step is prop up the ridge pole so it sits about crotch height. Be sure you use sturdy sticks (at minimum the size of your wrist) that aren’t brittle or rotting.
Continue on to page 3 for the remaining steps!


Nice. I need to correct you on one thing tho. In longterm situations a tent is actually a drag from my own findings thru several years of homelessness. Its easier and usually more efficient to just have a tarp if you have to carry shelter with you. Otherwise id say always keep a surplus of p550 in your bug out bags with a tarp or a good shelter can be made with painters plastic and a mylar blanket.
Good to know, @[100002138001851:2048:Cyrus Hunter]. Thanks for the tip!
Always willing to help guys. Survival is a lost art in my eyes. I hate using tv shows but dual survival season 1 has several usable techniques for shelter fire rescue and food. Im wanting to go to boss aswell, boulder outdoor school of survival