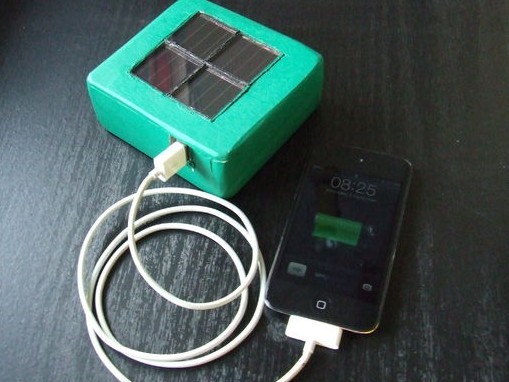
If the power goes out, eventually your phone will go out as well. It's better to be prepared for this than to wait for hours in line at an established phone-charging point in your town. For that reason, you'll need a small and portable solar charger. Learn how to make one yourself with the article below.
Step 1: Materials and tools
– 4x solar garden lanterns (I used the one you can see on the picture)
– 4x rechargeable AA batteries
– a double usb port
– 4x 150k ohm resistor
– 4x 560k ohm resistor
– 1x diode (no LED)
– a little bit of plywood
– a little bit of some kind of strong wood
– some isolation tape
– a little bit of wire
– solder
– some green spray paint
– some white paint
– some hot glue
– drill
– wood saw
– hacksaw
– soldering iron
– screwdrivers
– pincers
– a really small brush
– sanding paper/sander
– a hot glue gun
Step 2: Taking apart the solar garden lanterns
When you open up your solar garden lantern, you will probably see a circuit board with at least one LED, one solar panel (probably glued into the plastic case), one switch, two battery connectors and one battery.
Step 3: The circuit (usb)
You will need to solder one 150k ohm resistor to the data- pin/wire of port 1, as well as to the data+ pin/wire and also to both data pins/wires of port 2. Then you need to solder a 560k ohm resistor to both ground pins/wires and both 5V pins/wires. Then solder the other sides of all resistors connected to port one together, and do the same with port 2.
Solder 1 wire to both 5V pins/wires and 1 wire to both ground pins/wires. Take one switch from one of your solar garden lanterns and solder it to one of the wires. Solder the battery connectors including wire from one of your solar garden lanterns onto the switch and onto the other extending wire.
Step 4: Preparing the solar panels (part 1)
If you have solar garden lanterns with easy to take out solar panels, you can skip the rest of this step. If you don't, you will have to saw the plastic around the solar panels.
Step 5: Preparing the solar panels (part 2)
Glue the panels together. You need to make sure the side at which a red wire is connected, is attached to a side with a yellow wire. You probably don't have the same color wires as I do, so to compare, the red wire is the + and the yellow wire is the -.
Step 6: The circuit (solar)
You will have to make the long wires from the solar panels a little bit shorter. Then you solder three red wires to three yellow wires, so the will be in series and you have one red and one yellow wire left. Solder a diode to the + wire, for me that's the red one.
Step 7: The box
First you'll make the bottom and cover. Be sure all sides fit the bottom. You will also need a ‘battery holder'. By this I mean a piece of wood inside the box to keep the batteries on place.
You will have to measure the size of your usb ports and switch and saw a hole at the right size.
Then you can glue everything on place. First glue the sides to the bottom. Don't yet glue the cover onto the box, nor the circuit into the box! Place the ‘battery holder' by measuring the right place with the batteries.
Step 8: The cover
First draw a square on top of your cover of exactly the size of your solar panels. Then take out your drill and drill two holes inside this square. Next you use your fretsaw to saw the square. Be sure your solar panels fit the gap.
Step 9: Finishing the circuit
Now solder the solar circuit to the usb circuit by soldering the + wire from the solar panels to the flat battery connector and the – wire to the spring.
Then take all the battery connectors from your solar garden lanterns and solder three times one flat battery connector to one with a spring.
Step 10: Glue everything in place
Step 11: Embellish everything
To finish everything, I've painted a little 0 and 1 beneath the switch, so I could see if the solar usb charger is on, without having to plug in my usb device.
Sure, you can buy an effective and portable solar charger for your phone. Unfortunately, they can be very expensive, and many of them are actually quite heavy. If you want one that has just enough juice to put a trickle charge on your cell, then this how-to is exactly what you need. Not only will you save upwards of $100 or more, but you'll be able to practice skills that may be very useful if you ever find yourself in a SHTF situation.
This is an awesome and very useful lesson to learn, and if you want to see the original article, check out Instructables.
Shtf I’m smashing mine
If the SHTF, do you think there will still be operating cell towers?
Hahaha no electric no cell reception
Haha that would be the last thing I’d be worried about!
for all those commenting about reception just think of things like guides on your phone you downloaded before or timers or even just to find north