Below are some ideas of what you can make and what foods you should have in your pantry. In addition, below there are a couple of simple recipes. These recipes should be easy to make if a prepper already has these supplies at home.
DIY MRE’s or Meals Ready to Eat are the way to go when it comes to preparing for emergency situations, power outages, those wonderful rolling black outs that happen from time to time, the end of life as we know it, even just for a simple day of backpacking. Failing to prepare is preparing to fail. Benjamin Franklin said that, it’s a great quote and oh so true.
Grocery store
Creating DIY Meals Ready to Eat, is as simple or as complicated as you want to make it. You can go to the local grocery store and purchase any food items you might like to have in your personal MRE. First you need to buy yourself some sort of vacuum sealer and/or oxygen absorbers. Taking out all the oxygen will help to keep bacteria away from the food and also help to preserve its freshness.Under ideal conditions a homemade MRE should last you at least 5 years. Talk about cost effective!
Setting up you DIY MREs
You’ll need the following items:8 packs of instant flavored oatmeal
8 packs granola bars
Instant coffee, tea
Bag or hot chocolate pack
Paper towels
Dry milk
Plastic spoonsFollow these steps:
Open all the packages a remove the contents. Don’t remove the contents of the dry milk unless you’re going to use it all. Lay them all out on the counter.
Determine how much of each item you want in each MRE.
Separate them into their own little piles.
If you’re using instant coffee that comes in a jar and is not premeasured, measure out the appropriate amount according to the directions and place the crystals into a Sandwich baggie and twist or fold shut. Do this for each pile of MREs you have.
Do the same with the dried milk. Follow the directions on the package, place in a sandwich baggie and twist or fold closed. Do this for each pile of MREs you have.
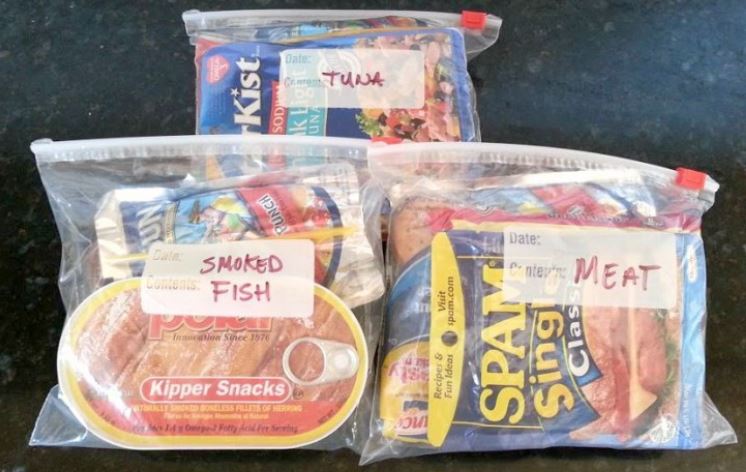
Once you have all your breakfast contents together assemble them in a vacuum sealer bag and seal. Don’t forget to mark what they are and date them.Ramen noodles
You can do a lot of things with ramen noodles. Things I’ll bet you haven’t ever thought of. Here are a few recipes for your DIY MREs.Ramen seasonings are filled with a lot of salt. On a hot summer day you’re probably going to need that plus plenty of water but with this first recipe you’re going to take out the seasoning pack and replace it with a dried tomato leather.
Item you will need:
I pack of ramen noodles
½ cup of dried shrimp or crab meat
½ cup of dried vegetables (your choice)
½ cup of tomato leather tightly packed
4 tablespoons parmesan cheese
2 cups water
To prepare:Break noodles into pieces
Combine all ingredients except parmesan cheese in pan
Bring water to a boil and cover
Remove from heat and allow to stand for 5 to 10 minutes
Stir in parmesan cheese and enjoyMaking Granola bars
Granola bars and trail mixes are great to have for back packing or just for snacking if you get one of those hunger pangs where you just need to have something.Making your own granola is fun and exciting. You just have to follow some basic ingredients after that you can embellish it with whatever you want. For your diy mre you should always have a sweet treat why not make it good for and tasty too!
Basic granola recipe ingredients:
2 cups rolled oats
½ cup honey
¼ cup well packed brown sugar
2 teaspoons of vanilla
Directions:Preheat oven to 350 degrees
Spread rolled oats onto baking sheet, stirring occasionally
Toast for about 15 minutes (while that is toasting)
Combine honey, brown sugar and vanilla in a large saucepan
Cook until brown sugar is dissolved
Remove rolled oats from oven
Reduce oven heat to 300 degrees
Immediately pour rolled oats into the hot liquid
Stir to combine
Butter baking sheet to prevent sticking
Turn mixture onto baking sheet, flatten and evenly distribute
Bake for 25 minutes
Cut into slices
This is a basic recipe the recipe which why there is nothing added to it.Trail mix
Trail mix is great to have in your Meals Ready to Eat. They are great to snack on and a quick fix when you’re in need of something quick. You can add candy to these as well as dried fruit and nuts for added protein. In a pinch they will do the trick.Items you will need:
1 cup almonds
1 cup peanuts (skins on)
¾ cup cashews
¾ cup brazil nut (optional)
¾ cup glazed/sugar coated pecans
1 cup raisins
1 cup M & M candies
1 cup Reeses Pieces candies
Mix all these ingredients in a large bowl and you are done. Bag them up and seal them in. Don’t forget to date them.
We like the idea of ramen noodles, which always get a bad rap as a healthy meal. While it’s true there is a lot of salt involved, this is good for the summer when salt is needed, especially for those who will be doing a lot of walking and hiking.
And any type of trail mix, particularly a mix made by yourself with ingredients you love is always tasty and a great filler!
For more ideas and ways to package your survivor meals, including Mylar and canning, go to Survival Mastery.
Brittany Poormon
I eat that everyday
Jennie Smith
Andy Lay
Tanya Wilson
Joe Solo Skoob Rivi
WTF is tomato leather??!!
Nathan Glynn Edwards