Making broad-head arrows with a modified spoon as the tip is an easy project and you can store them in your survival kit or bug-out bag.
You should make three to five in advance of any survival situation and you should also brush up on how to make an arrow shaft and fletching as well as a bow.
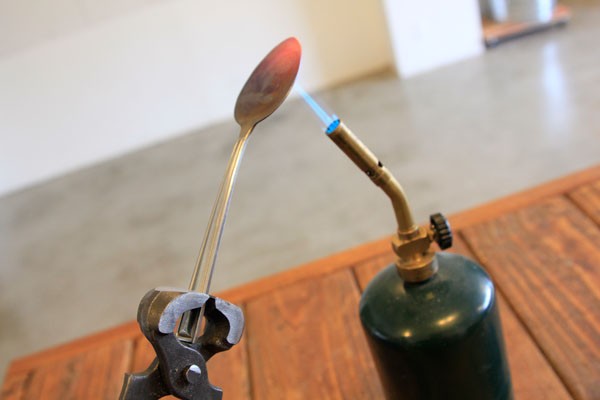
Step 1: Light your plumber’s torch and heat your spoon end, holding it with a pair of heavy duty pliers because it will get to be a red hot forging temperature. Then use the anvil surface on your vice, or any hard flat surface, to forge down the spoon flat.
Repeat the process of heating and hammering, until the spoon is totally flat to provide an arrow that slices through the air. Leaving in that curve of the spoon head even a little would act as a rudder and take your arrow way off course.
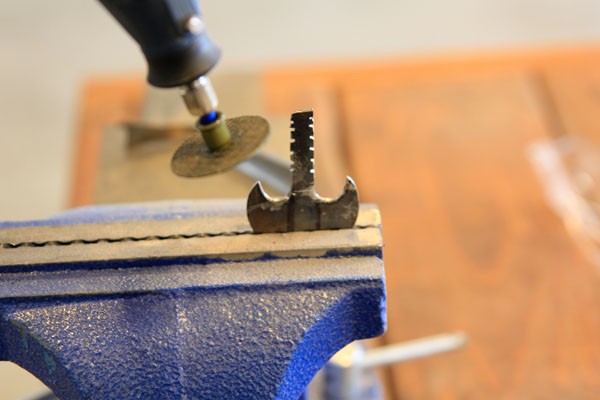
I also forged down a one inch section of the spoon neck, flattening it to same thickness as the spoon head. This makes it wider to cut in notches later, and also makes it so the section of the arrowhead in the arrow spine is not too thick to prevent arrows from splitting.
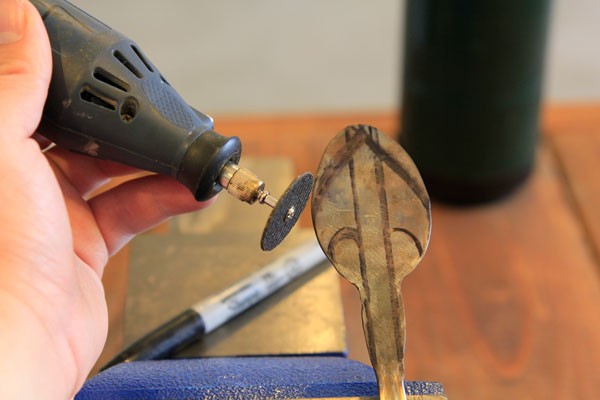
Step 2: You can freehand-cut the arrow if you want, but if you have a sharpie handy, use it to draw out the broadhead shape you wish on the arrow. Then, using your rotary tool, cut the shape out, and grind the edges to form a blade tip.
Detach the spoon from the multitool or cut off the excess of the spoon handle, then file a few notches along the neck of the spoon handle. This part will go down in the wood arrow spine, and the notches will catch the string binding you will put on later to keep the arrow head in place.
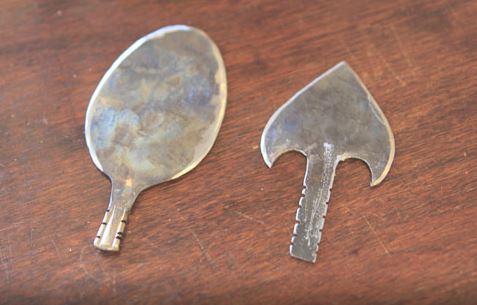
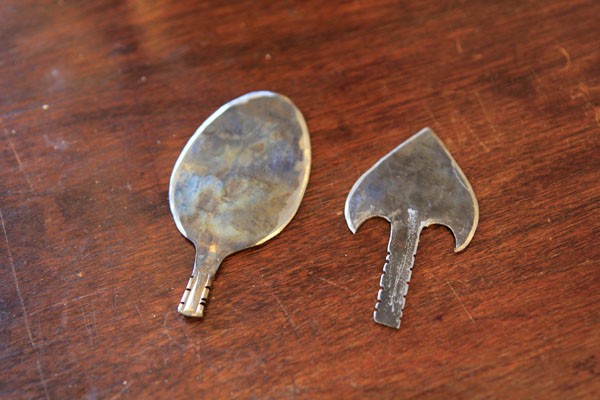
Step 3: You can use a mini knife sharpener or traditional wet stone to give the arrowhead that razor sharp cutting edge. Below also shows the less difficult version with an oval-shaped broadhead that I didn’t cut into an arrow shape. The arrow shape advantage over the oval, is the back barbs, to cause more damage if the animal attempts pull out an arrow.
Sharpening is obviously the best step to make sure you have max penetration of the arrow head, but it’s not completely necessary. Even with no sharp edge, it still would make a very effective arrowhead at the high speeds arrows achieve.
I like to keep at least 4 or 5 of these easy and cheap heads in my bug out bag, with a roll of duct tape for fletching (which gives the arrows stability, we’ll cover that in another post). Then I know I can just find the wood for spines and bow while I am on the GO! The most effective way to use these is to just split a wood dowel one end, and bind the head in between the two halves with some type of binding to reinforce them.
Broad-head arrows are one way you can greatly improve your ability to fell and kill game in a survival situation.
Remember, though, that they are illegal to use in some states, so check the laws that pertain to your state.
To see other survival weapons ideas, please check out Survival Life.
@[100006577329176:2048:Jeremiah Hamilton]
I buy spoons at yard sales just for this. I thought I was the only one. Also I polish mine, it smooths the metal for better performance. And don’t forget to temper them, you don’t want them to bend. Get creative with the shapes and designs. Great post, I think I’ll make some tomorrow.
William Villiard I thought you may want to see this
Justin Locke
Nathan Vinkler you must check this out. John Halifax how do you temper the ones you make?
Kanisha Adams
Rusty Shackleford
I’m interested in how you heat treat them and what hardness they are after. Do they flex? Do you also temper them?