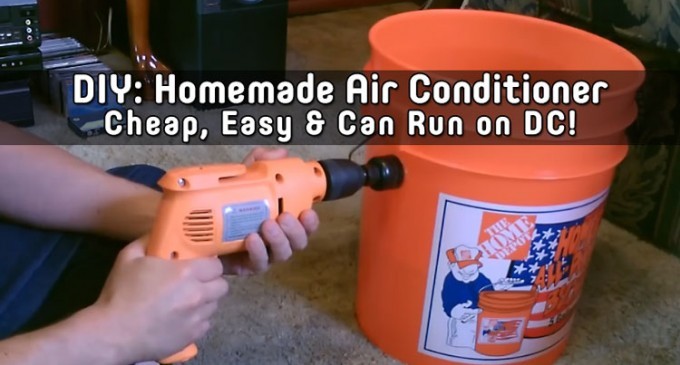
STEP 2: PREPARE PLASTIC BUCKET
Now that you have all of the materials and tools listed on the previous page, it's time to make the 5-gallon plastic bucket.
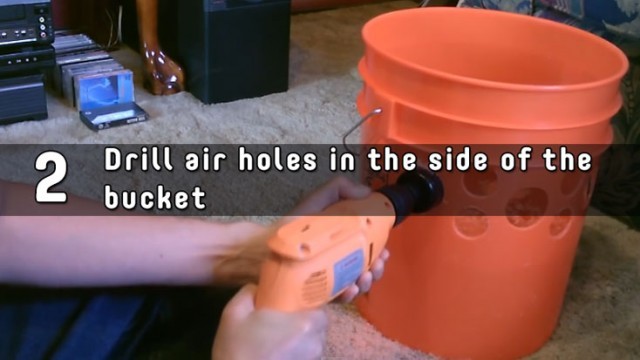
Begin by filling the 5-gallon plastic bucket with about 2 gallons of water. Mark the level of the water, then add some dry weight with an object like a brick. This is just to give your bucket added stability while you're working on it, or you can leave the water in the bucket, which will also work as weight.
Now, make some holes in the wall of the bucket. You'll want to ensure to keep the lowest ones above the water line you marked. Make sure the holes are evenly spaced out around the unit.
Now it's time to cut the pad to fit.
STEP 3: PREPARE THE PAD
Next, you'll need to cut a piece of the pad. The measurements are 13-14 inches high and 30-31 inches around.
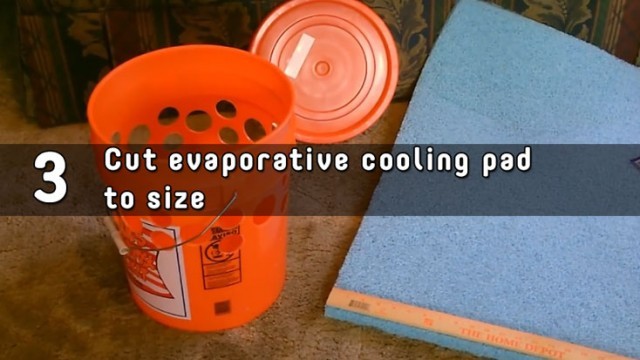
As you'll later see demonstrated in the video, a long straight-edged ruler will make this step a lot easier and tidier. Keep in mind you may have to trim quite a bit to get the paid to fit just right. At this point, it's smart to take down the final measurements of the pad so that if needed you an easily cut a replacement. You'll also need the measurements for the next step as well.
The video at the end also does an excellent job at showing you how the pad fits as a visual.
The cooling pad will hug the walls of the 5-gallon bucket, and a screen will help hold everything in place. Learn how to set that up on the next page:


Agreed, this is a swamp cooler
Do you own a freezer?
18to24 hours
Yes but not much room in it but maybe could fit two ice trays a time and feel I need more than I could supply…