A cold springhouse is one method of getting access to a constantly fresh source of water; you might have to purify the water, but it alleviates having to dedicate a lot of area for water storage or taking a chance on digging a well.
Here is one design that will at least give you the basics if you decide a spring cold house is for you!
The Location
The best location provides the ability to build the spring house into a hillside making earthen walls. If this is not possible, build the structure on level ground next to the running water. Avoid areas with lots of roots or rocks. You will be diverting water from the creek into the spring house and back to the original creek bed.
Measure the depth of the creek at the center in several places. You need the average depth for the trench that will run through the spring house. Remember that water seeks its own level, therefore, maintaining the average depth of the creekbed for the trench will allow the water to flow easily through the structure and back out.
Determine the distance from the spring house to the creek. Make it close, but not directly next to the creekbed. The creekbed is more likely to collapse if the diverting trench is too close to the wall of the creek. Aim for a width where you can safely walk between the house and the creekbed.
The Structure
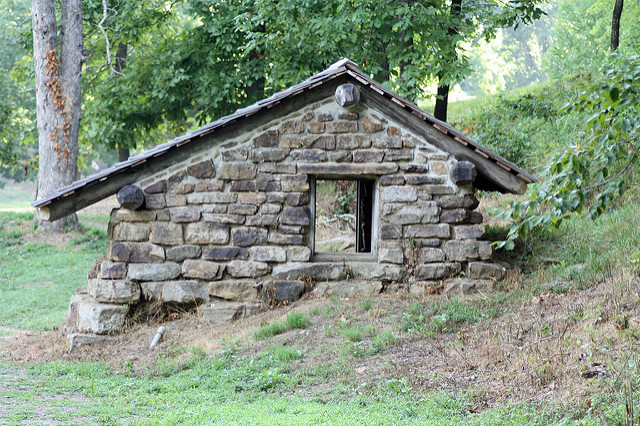
The earthen method of building it into a hillside is more ecologically sound and uses much less material; the trade-off is construction time. A free-standing unit uses more material but takes less time. If you have the choice, determine best use for your needs.
Excavate the hill to build an earthen spring house. Determine the width and height of the intended structure.
A freestanding building can be made from stone, brick, wood or block. Stone walls using slip form construction are the most efficient because they control costs with material already available around you. Brick and block are good alternatives if you have some mason skills. Wood should have foam or other insulation used to keep the temperature controlled.
The Floor
Dig a trench equal to at least a 10-foot square with the depth of at least 6-inches. The floor depth keeps the concrete from cracking due to ground contractions during the change of seasons. Check your local university extension office to determine your areas frost lines.
Locate the diversion trench against the side of the structure closest to the creekbed. Dig out a 3-foot wide trench the depth of the creekbed. Dig the trench from either side of the spring house to where the trench will turn towards the creekbed. Do not break through the creekbed yet.
Construct the framework for the floor from the 2-by-4 lumber. You will have two frames; a very large rectangle and a narrow rectangle. The wide rectangle will frame out the walkable floor space. The narrow rectangle will form the floor between the wall and the trench. You want the narrow frame at least the width of the wall because one wall will be resting on the concrete.
Lay a 1-inch layer of gravel inside the frame. Rake it level. Pour in the concrete to fill the frame. Use a wood beam and a helper to level the floor and remove air bubbles. Move the beam back and forth while moving along the length of the floor. Allow the concrete 24 hours to cure.
Some caveats:
You must check with your local government to get the required permitting and likely with the state government to make sure you alter the landscape is done legally; this can take time and money.
This also only covers the cold springhouse. The next step is to pipe the water to your survival encampment.
Finally, there are many designs and ideas for cold springhouses and you should do research to see which fits your needs best.
For more information on cold spring houses, check out Bright Hub.
Featured Image via Flickr