Here are some step to prevent an injury, scrapes, cuts or whatever, from being a minor inconvenience to becoming an all-out infection. You never want to find yourself in this situation so do the following:
Cleaning
Cleaning is actually pretty simple. Most of you have probably done a pretty decent job with your own wounds, but I want to give you some steps to increase your success, especially in austere conditions.
First, the items you need:
Leatherman Style PS. Which is TSA Friendly.
Gloves. If it’s wet and not yours, you shouldn’t touch it.
Container for water. You do carry water, right? I carry bottled water in cheap lightweight bottles.
Steri-Strips.
Gauze. A few 4x4s and a few 2x2s.
Tape. Duct or sports or medical.
Optional: Baby wipes.
Optional: Soft Bristled Toothbrush.
Optional: Tweezers. Good ones. I like the kind with an angled tip.
Optional: Tissue Forceps.
Optional: Hemostats. Curved or straight.
Optional: Magnifying Glass (or a fresnel lens like the one found in the ITS Mini Survival Kit)
Optional: Iodine.
Optional: Plastic wrap.
All of the above (non-optional) can fit in a pretty small kit and I wonder if there are any companies that could put together such a kit…
I like the Leatherman Style PS because I can travel with it anywhere because it has no knife (and I can generally buy a workable blade anywhere I go). It has tweezers, small pliers, a flat screwdriver and scissors; everything you need (though you can certainly supplement with optional items). Gloves should be obvious.
You’re going to use a lot of water.
You also need copious amounts of “clean drinking water”. No, you don’t need sterile saline water or any other nonsense. If you don’t have access to a lot of water, you can use a weak iodine solution. Lots of people will throw out percent solutions. Just go with a “weak tea” coloration. I promise it will be fine.
The reason I like lightweight bottles is because they’re easy to cut the top off of (and you don’t feel bad about it). This gives you a container for holding the water used to irrigate and allows you to use the top as a splash shield.
Get your work area set up. Try and keep the area as clean as possible, but remember, you’re not making a sterile field. Have easy access to your water source. Here are the steps:
Step 1: Clean the whole area around the wound; as big an area as you can get away with. Baby wipes are great here. I always keep some in my pack for other hygiene purposes. For the above hand, I would clean the whole hand at least up to the wrist. What you are looking to do is to clean away any potential sources of contamination. There’s not much worse than spending time cleaning the wound (and subjecting your patient to significant discomfort) only to find you got grunge from their body right back in the wound.
Step 2: Expose the wound and pick out any large pieces of debris, including any impalements that meet the above criteria.
Step 3: Rinse the wound with pressure, using the syringe. Fill it with water and use it to pressure spray the wound out. Aim the stream away from you (and the patient if possible). Use the top of a water bottle as a spray shield if you want. You will likely need the pliers/forceps/etc to hold the wound open while you do this. If you have a toothbrush, you may need to gently scrub the insides to loosen up bits embedded in the fascia. You’re going to use a lot of water.
Step 4: Pick out any new debris you’ve loosened or freed up.
Repeat 3 and 4 until you cannot see any more contamination. This is where the magnifying lens is helpful. Your goal is to remove anything that would be a potential “hotel” for bacteria. These could be as small as a grain of salt.
Cleaning a wound outside of a nice clean hospital can take 20-30 minutes to do correctly. This process will also be very uncomfortable for both you and your patient. If the wound is big enough (or contaminated enough) hopefully they’ll pass out. Hopefully, you won’t pass out.
Protection
Obviously, after cleaning the wound, you need to take steps to prevent further contamination otherwise you’d need to just start the whole process over again. There are two main concepts you need to understand with respect to wound protection, bandaging and dressing.
A “dressing” is a protective cover that seals the wound.
A “bandage” is a support for the dressing (and may also protect the dressing).
I’d like to go ahead a preempt the whole suture conversation (this includes staples). The answer is “NO.” A suture is nothing more than a semi-permanent, durable dressing. It’s not some mystical Tier One skill, but it does have a specific time and place.
Wound cleaning isn’t a skill you want to do in the backcountry for the first time.
It’s generally a bad idea (as in potentially lethal, or disfiguring) unless you can both guarantee you’ve done a perfect job of cleaning the wound and have the training to suture effectively. Plus you’re actually creating new wounds with each needle poke or staple point. Suturing is well outside the scope of this article.
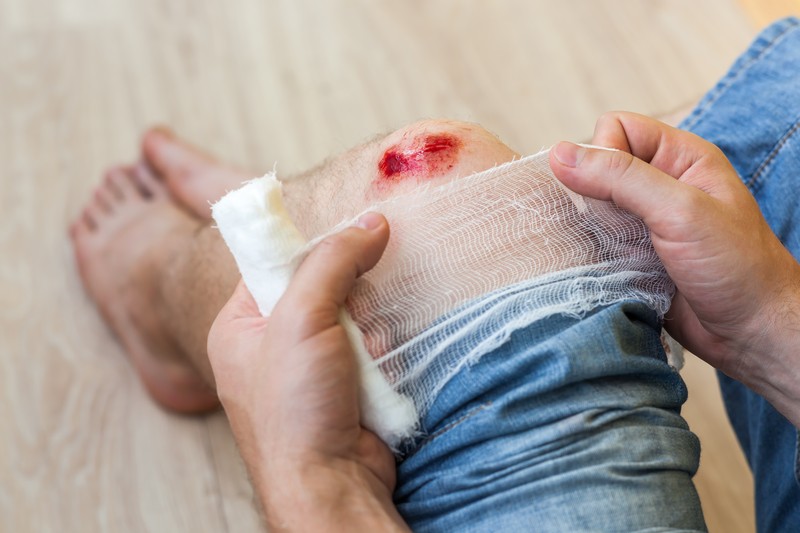
There’s no hard and fast rule for dressing a wound and everyone develops their own technique. Following is an example of dressing the wound from the example in the introduction; other wounds are going to have slightly different requirements. Follow these steps to close the wound with Steri-Strips:
Dry the area around the cleaned wound.
Approximate the edges of the wound (which is fancy medical speak for “try and realign the edges”).
Tape it with the Steri-Strips.
It can be helpful to anchor the tape on one side and then gently pull the tissue, with the tape, toward the matching edge. That way, you’re not pinching and pulling too much tension (which can create issues with swelling and wound healing later). With wounds, like the one on the hand, you need to be cognizant of the way in which the tissues naturally pull and stretch with movement and make sure you don’t create a situation where the person is going to accidentally defeat your dressing with simple movements. Avulsions and abrasions won’t fit the above technique because of the way the wound presents.
After the wound is “closed” then you should “bandage” it and add an absorptive layer to soak up any fluids that will leak from the wound. For the hand, in the example, I would fold over some 4×4 gauze pads and overlap the wound by at least one-half to three-quarters of an inch on the sides. To secure the pad, I would wrap the whole hand with plastic wrap (much like doing a boxer’s wrap).
The reason I like plastic wrap is it allows me to see if the gauze is getting saturated. It’s also thin, reusable and it’s really hard to put too much pressure with it (like with an ACE wrap). Also, if you need some non-chemical pain control you can apply ice/snow/cold water/etc. to the area with good conduction.
To read more on this very vital and serious topic, to make certain your wound does not become infected, go over to Imminent Threat Solutions.
Treat and monitor your patient or yourself carefully and, depending on how serious the wound is, consider picking up and leaving for home or your bug-out shelter right away. If a fever presents itself that can mean infection so act accordingly!
Most of all, watch out for yourself, try to prevent injury from happening in the first place, but be prepared just in case it does!
Does`t everybody know that?
Befor we headed to the Bush in Alaska I made a medical kit.with pain pills and everything I could gather.still had emergency husband had to be taken out by helicopter.the boys put a SOS out and flagged a plane down.
Rub some dirt on it and get back to work