The only way to get good at making an effective snare or trap is to practice making them (then taking them down so you do not accidentally kill someone's pet or traumatize the kids with a dead squirrel in the backyard.)
Knowing how to make a trap or snare is one of those survival skills that can be a life saver – not only can it ensure you get vital food, it also is silent, which in a SHTF moment, could be a life-saver.
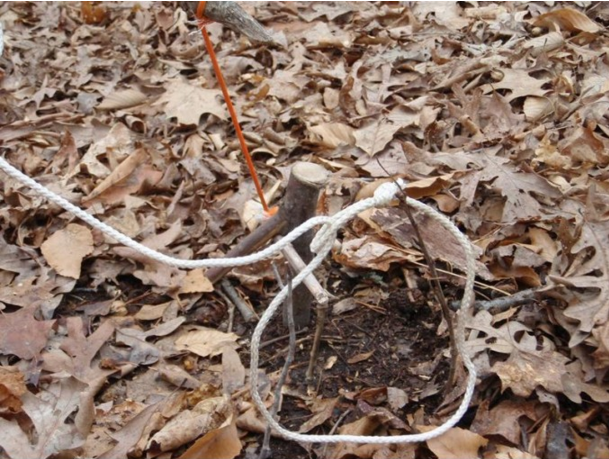
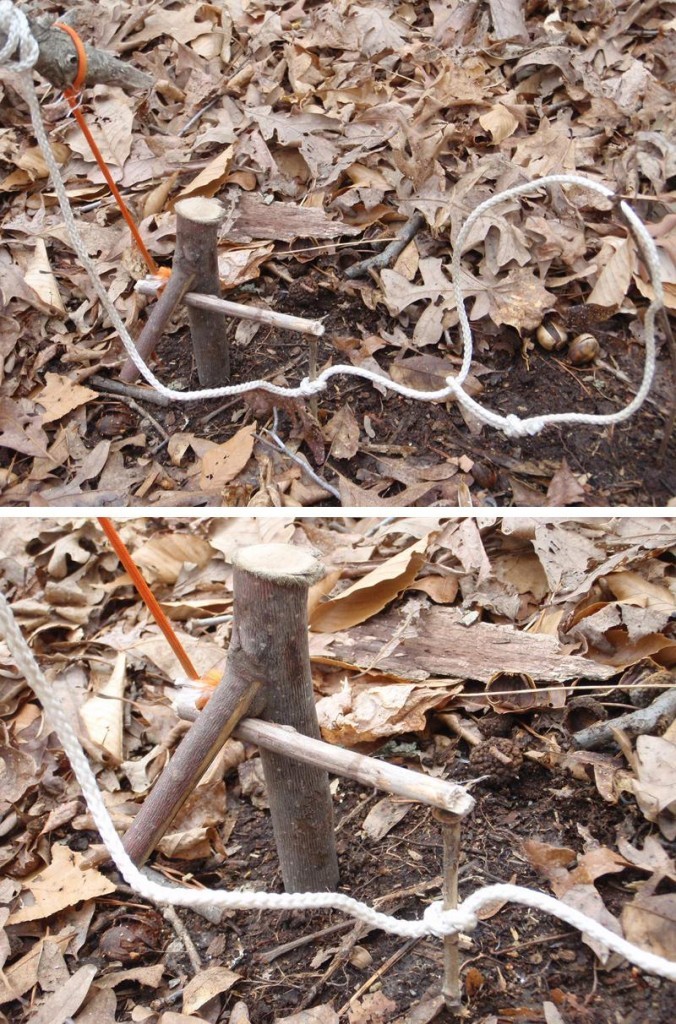
1. Grave’s Bait Stick Snare
This bait-activated spring pole snare comes to us from a little-known and long out-of-print book called Bushcraft, by Richard Graves. The Grave’s bait stick snare is my go-to trap for most animals and occasions. To build this trap, you’ll need a spring pole, a forked stake to drive into the ground, a pencil-diameter toggle stick, a snare line with an attached trigger line, a bait stick, and some bait.
Tie the snare line to the end of your spring pole. Bend the pole down until the snare line touches the ground and mark the spot. Drive the forked stake into the ground at that spot. This keeps the snare line more or less plumb, which is vital to setting the trap. Tie your pencil toggle to the end of the trigger line, which is attached to your snare line. Run the toggle under the fork on the stake in the ground, keeping the toggle parallel to the ground and at a right angle to the stake. Next, set your baited trigger stick out at the end of the toggle, which should set the entire trap. Now, set it off to test it. If it springs quickly, set up some twigs to support the noose, then reset the trigger.
Warning: Never handle the noose of a snare line with your bare hands or fingers AFTER the trigger is set. If the trap misfires, the noose can close on your hand or fingers, ripping off skin or even a digit.
2. Grave’s Motion Triggered Snare
This is a variation of the Grave’s bait stick snare that can be set for motion activation, no bait required. You’ll need all the same things as you would for the standard Grave’s bait stick setup: spring pole, forked stake, toggle, trigger stick, and snare line.
The difference in this set is that you place it near a trail or run, and your snare line is tied around the vertical trigger stick. The action of the trap is simple: When the noose tightens and pulls from the animal getting caught, the trigger stick is pulled out from under the end of the toggle, setting off the trap. Just make sure the snare line or toggle line don’t get hung up under the fork of the stake in the ground, which would hang up the whole trap.
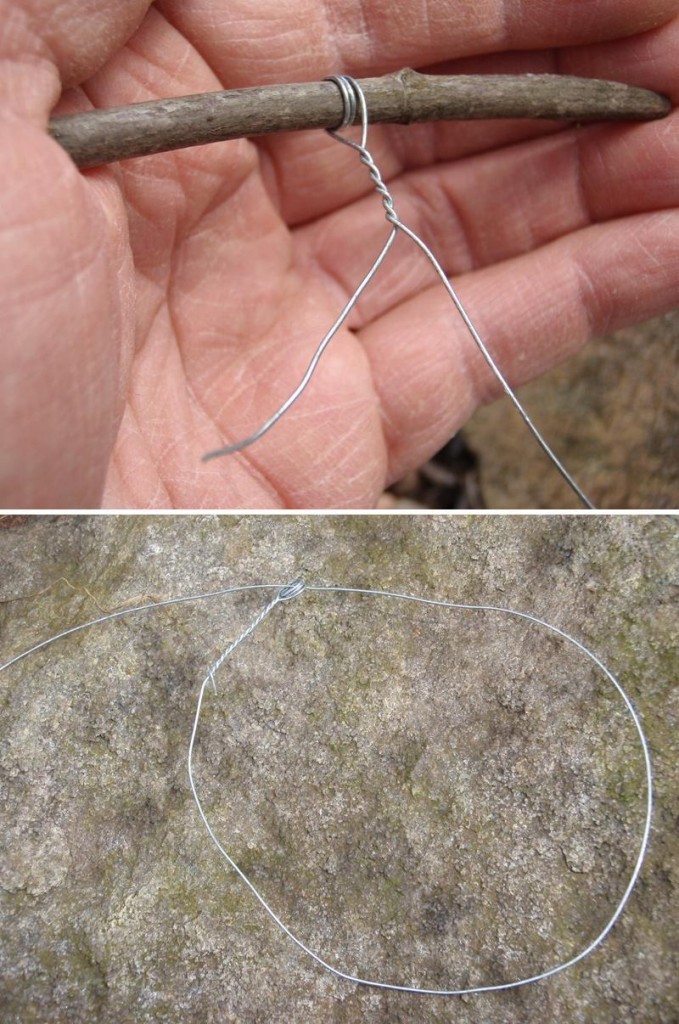
3. Fixed Snare
The fixed-loop snare is made from solid wire—or better yet braided steel cable—for a combination of strength, rigidity, and flexibility. These are usually single-use traps, as the caught animal often bends and kinks the wire making it vulnerable to breaking. Flaws aside, the fixed snare can be the fastest snare to create and set.
Find a twig that is 1/8 to 3/16 inches in diameter that is breakable. Wind one end of your wire around the twig two or three times, then twist the twig like a propeller, which will twist the end of the wire closed. Break the twig and remove it to reveal an eye that you use to make the noose. Place these snares over burrows and in small-game trails, or attach them to spring pole snares for a more secure snare line.
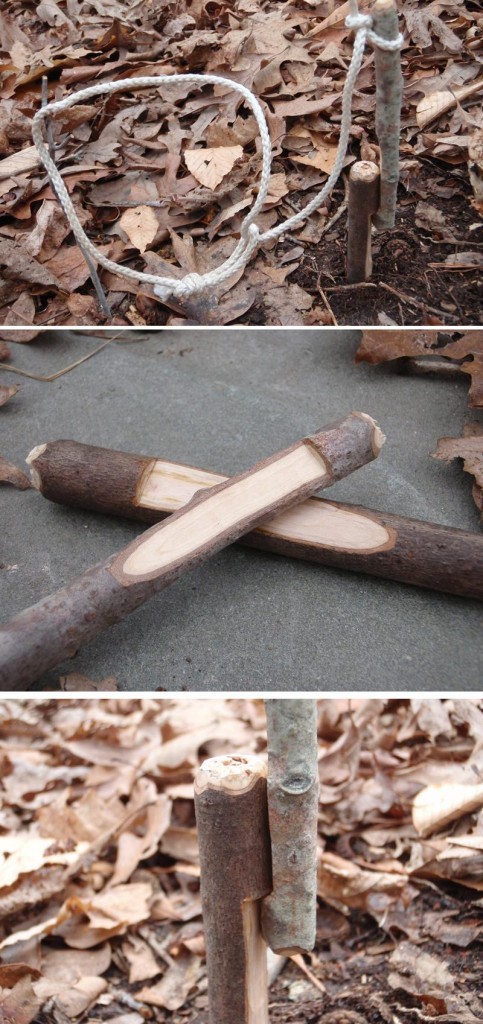
4. Peg Snare
The peg snare can give neophyte trappers some trouble if they don’t know which side of the peg to tie the line, but this trap is relatively easy to set. You’ll need a spring pole, a peg driven into the ground, a snare line with noose, a peg to act as a trigger, and maybe some bait. That last part will depend on whether you plan to make the trap either motion- or bait-activated.
Carve a hook near the top of your peg and drive it deep into the ground. If you had a saw of some kind, you could also saw off the top of a standing bush or sapling. This woody plant and its extensive root system will provide an exceptional anchor for your trap, which is especially valuable in sandy soils where pegs and stakes are often yanked out of the ground by the spring pole. After you set your ground peg, carve a matching hook in your trigger peg, which will grab onto the hook in your ground peg. Tie your snare line to the spring pole and tie the trigger peg into the line. Make sure you tie the knot on the trigger peg on the side of the peg you have cut the hook into. Tying the line elsewhere on the peg will pull the trigger at an odd angle and you’ll never set the trap. You can attach bait to the trigger peg with the noose hanging around the baited part. Or you can set the noose in a trail near the peg trigger.
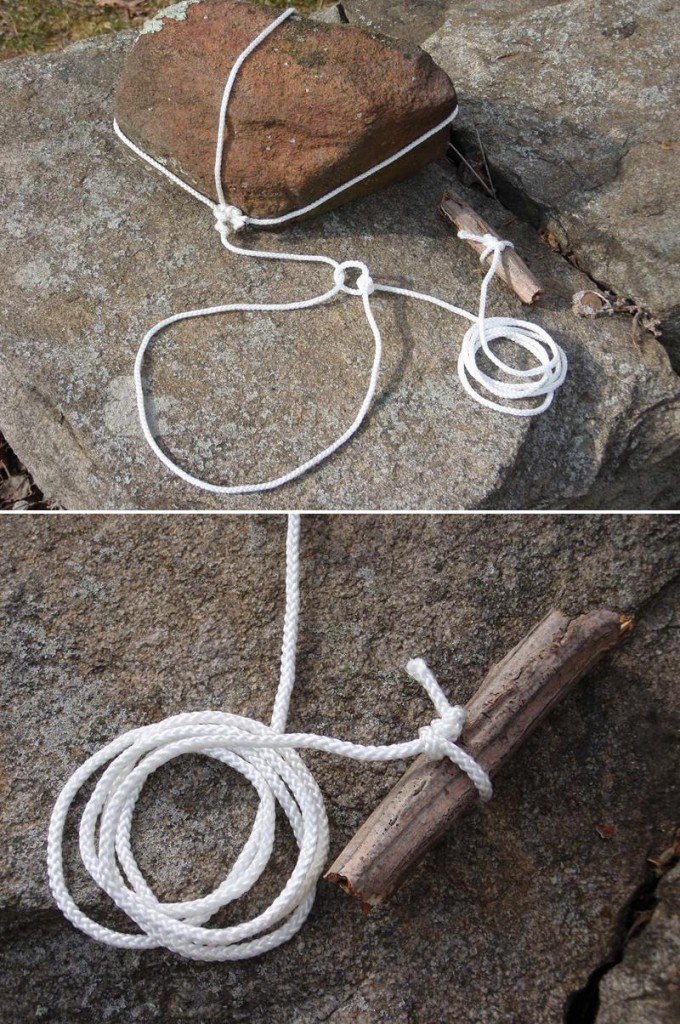
5. Drowning Snare
This simple trap can acquire food for you and put the critter out of its misery faster than other traps. The drowning snare requires a snare line with a noose, a heavy rock, a float stick, and a stick to prop up the rock in a precarious position.
This is often the easiest trap to set, providing you have a steep-banked waterway that is frequented by creatures of habit, using the same runs to get in the water over and over.
To make this trap, simply tie the snare line to the rock, leaving a length of line free to tie the float. Set the noose in a run or slide that is heading straight into the water. Prop up the rock so that it will fall if the noose is tugged. You can also tie the prop stick in line on the snare line. The animal pulls the rock in after them, drowning. The float lets you see where the rock and animal are located underwater. In cold conditions, this trap makes the most sense of all traps, with the cold water keeping the animal intact, chilled and away from scavenger animals.
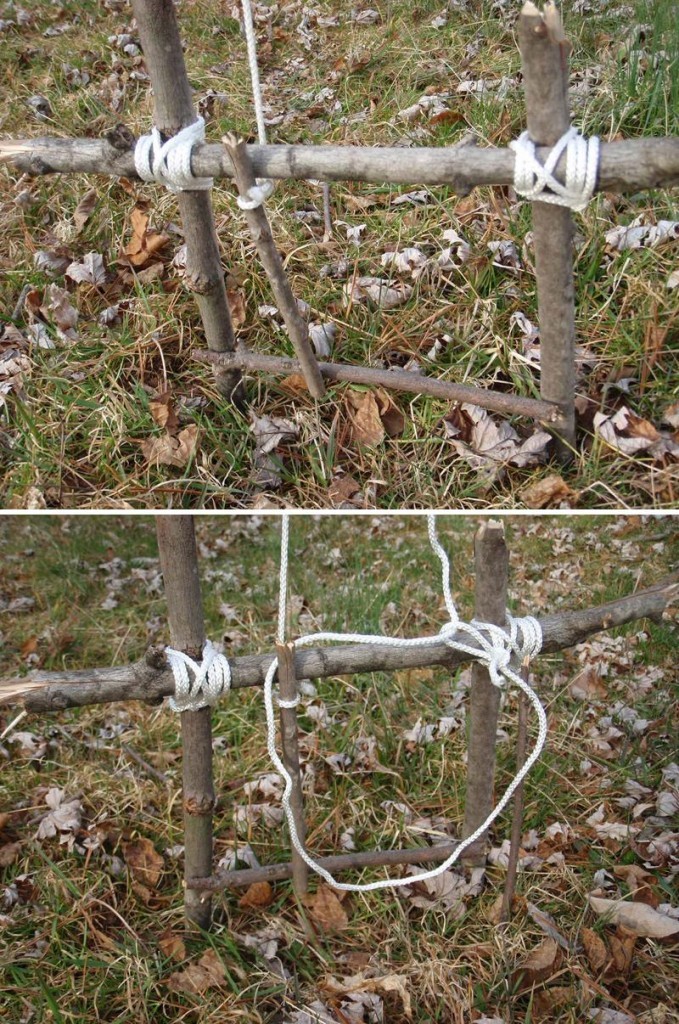
6. Treadle Snare
This “spring pole and noose” trap is set off by the animal bumping the treadle stick by stepping on it, knocking it down, or knocking it out of their way while running down their trail. The treadle snare requires a spring pole, a snare line with noose and trigger line, a pencil-sized toggle stick, the treadle trigger stick, and a support to hold the trigger stick.
Begin by tying your snare line to the end of the spring pole and tying the toggle stick to the end of the trigger line. Pull the spring pole down, then lap the toggle over the support, using the treadle trigger stick to hold the toggle in place. Set the noose of the snare line so that it hangs beside the treadle, and wait for your dinner.
The one thing the survival Principle of 3's does not tell you is that while you can last three weeks without foot, each day, simple tasks becomes harder to accomplish; the clock starts ticking, so to speak, at the conclusion of your prior meal.
One way to make sure you can gain access to critical nutrients, protein, vitamins and minerals is to learn how to make a trap or snare.
To see instructions for other traps and snares, please visit Outdoor Life.
Does this trap work with lions in Zimbabwe?
Let’s go over and try it lol
Very cool. I think I’ll try a few of these when I get time.
@[100003378041613:2048:Zack McBee]
@[100000071042343:2048:Luke Holzhei]
Thanks
@[100000124222667:2048:Charles Neil Prestwood] @[1823320764:2048:Jace Hargrove] @[1509180041:2048:Joshua Randle] @[184104330:2048:Stephanie Holmes Watkins]
@[100001058998142:2048:John Nick]
@[100002350522011:2048:Bubba Miller]
Jace Hargrove Stephanie Holmes Watkins Charles Neil Prestwood
Mishy Sanschagrin
Some traps are harder to spot than others:
Dylann Farley
Cool
Nathan
Nick Moeller
Yes the cross bow began as a hunting trap.
Zing!
lmao
Adam Fowler
You need to learn and practice trapping and snaring prior to when you are in a life and death situation. Thats like telling someone not to bow or firearm hunt until they are starving.
Need to make the mistakes now.
Gavin Taylor Aaron Taylor
I need to brush up on my tactics as well. Been sometime since I’ve actually eaten anything not taken by firearms.
Callen McIntosh
Here is a good trapping series for ya…http://survivallife.com/trap-for-your-life-part-3/
That would work well for blm punks just bait it with free$#%&!@*or somebody’s else’s $#%&!@*
I want to try this but I am afraid of hurting someone’s pet