Fish are a prevalent and easy to catch a source of nourishment in a survival situation – provided you know how.
Here are a few options open to you in almost every circumstance.
Set a control line (hopefully with the paracord you also brought in your kit), and attach it across a narrow, fairly shallow, portion of the river to two opposing trees. The fish swim directly into their path when bait is attached.
• The narrowness of the placement will keep fish funneled into the path of the hooks, so you will be able to spread the hooks 8-14 inches apart and have a reasonable expectation of catching fish.
• The fact that there is a passivity built into the technique means your time is spent doing other things, and the fish aren’t scared off by your movements in or near the water, or by you looming over them.
• The full-time deployment means that it’s just a waiting game until you get something to eat.
• Turn over a log and find grubs, worms, or even flying bugs to bait your hooks. Anything like that will work, but try to make it as natural as possible.
This is the simplest method, and can be quite effective if you packed your survival kit.Setting Up a Fish Screen
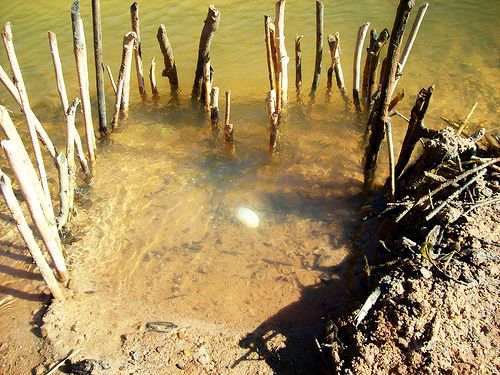
Take three sticks of substantial size (2 inches in diameter will work), and lay them out on the ground about 8-12 inches apart. Weave supple, sapling branches (which are thin), in and out of the three sticks, so that the combination forms a wall of wood with obvious space for water to flow through.
The tension caused by the sapling’s flexibility will keep the three sticks in place and, if needed, you can strip thin strips of the bark from young saplings to tie down the different pieces. The thin strips can even be combined and braided to create a makeshift cord to use as a low-strength rope. Create enough screens (7-12 of them) to make a substantial fence line in the water. You will anchor these fences by sticking the ends of the three sticks into the sand or mud at the river bottom.
• Start on one side of the river at a narrow spot (make sure it’s down current from your baited leader hooks) and cut in perpendicularly for the first screen and then angle the rest so they mimic the flow of the water, until at the other side of the river, you complete the fence by attaching them to that river bank also.
• Fish will not know they’re being obstructed as water flow will still be normal (remember it’s flowing in between the sapling branches like a screen).
• Fish will be corralled into the far corner of your “fence line,” which can then be closed off and your fish kept alive by leaving them in the water until you need one.
A significant amount of fish can bet gathered this way, and you should check often to be able to corral more and more of them.
Create A Fish Wall
A more active approach might be achieved by damming a river a few feet past a bend so the fish don’t realize that the water flow has been impeded. They swim straight into the dam and then you (lurking on the banks nearby) can spear or even grab them.
You can use your fish screens in this way as well, but it does require a more active role in obtaining the fish. Using this method in conjunction with the other two methods can create two passive sources of fish and one active source, which may have you reeling (ok, pun intended this time) in fish, in no time.
Create A Fish Net
Use the strips of sapling bark (the greenish flexible wood on the outside of the branches/sapling trunk) to create a loose mesh of wood. Tie a series of strips to one long strip and then, spacing and repeating about 1 to 1 1/2 inches farther down, tie another long strip onto the series of strips. You will want to make simple knots to make a series of interwoven strips that, when looked at from above, will resemble a checker board.
Take a ½ to ¾ inch thick sapling (which has a bit more white wood in it), and cut to a length of about 4 feet (preferably using the entire stalk of a four foot tall skinny sapling), and strip excess branches and leaves from it. Soak it in the water for an hour or two until it becomes waterlogged. The excess water in the fibers of the wood will make it somewhat more flexible and when it dries, the white wood will make it more rigid.
Bend the top (skinniest part of the stalk) around to form a letter “P” or a tennis racquet shape and tie the end off onto the long straight part of the “P” where it intersects (somewhere in the middle). Secure the tie off with additional pre-prepared sapling strips or a set of braided strips.
If you brought your survival kit, use your para-cord. Now you will tie the leftover ends of your checkerboard design (which should be about 3’x3’ or even up to 5’x5’ in size) to the inside of the circular portion of your “P” design, and lash them securely with a wrapping technique like a baseball bat handle or a tennis racquet handle, where a third of the past wrap is covered by the new wrap. You will want to make this thing bulletproof. It may end up being a shallow net and it won’t be incredibly strong, but as an aid to grab an escaping fish, it will come in handy and is certainly worth the effort.
The loose mesh technique could also be used to create a series of nets that could be used to catch fish. Just loosen the spacing up a bit more to about 1¾” to 2¼”. Allow some more material to gather between each knot instead of making it a straight checkerboard design.
In virtually every environment, fishing is an option to secure protein and nourishment.
While fish do not live in every body of water, they can be found in just about every body of water.
To learn more about survival fishing, check out Eco Snippets.
Featured Image via Flickr