This is a cool project that could serve you well in a survival situation, as a science project or just for a project to learn how flashlights work and how water can be used to produce electricity.
Best of all, because it is watered powered, it can be used just about anywhere!
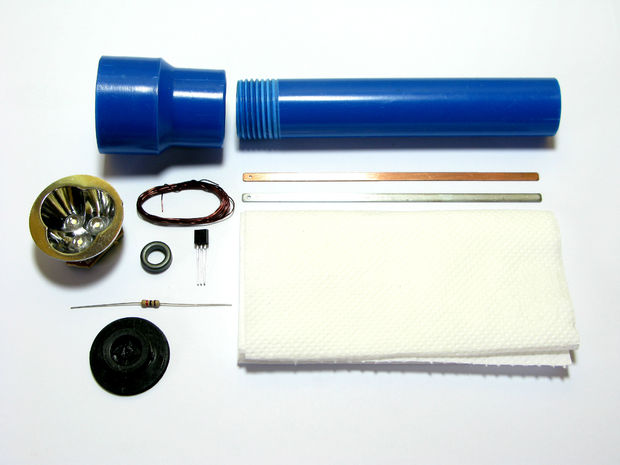
Procedures: Assembling The Power Cell:
1st.) Roll tissue paper around your “Copper Strip” until you reach the 3rd sheet.
2nd.) After reaching the third sheet, roll the “Zinc Strip” until you reach your final sheet, which is the 5th sheet.
3rd.) Now tie some copper wire around the PowerCell, this prevents your tissue from tearing once it gets wet.
4th.) I recycled a pulley since it fits snugly on the PVC Coupling, puncture 2 slits for the metal strips to fit in.
5th.) Insert both metal strips through the pully's hole and seal/ waterproof it using epoxy/ superglue/ hotglue.
Assembling The Joule Thief
What's A Joule Thief?
A “joule thief” is a circuit that helps drive an LED light even though your power supply is running low. What can we do with it? We can use it to squeeze the life out of our drained batteries. Bottom-line, this circuit makes LEDs glow even at low voltages.
Let's get started! Hummm, you probably encountered a joule thief before. Lucky for you I have a more detailed guide about making a simple joule thief found here: Making A Simple Joule Thief (made easy)
If you already know how to build one, you can just follow the simple diagram from above. I needed to make my circuit more compact so I soldered my transistor below the LED's board while the toroidal core was glued above the LED's board.
Combining The PowerCell & Joule Thief
You probably came to a realization that the flashlight, uses to two separate projects, the PowerCell and the Joule Thief circuit, in order to work.
For this step, solder the wires of the “PowerCell” to the “Joule Thief” then apply superglue around the coupling. Finally superglue the LED's reflector to your coupling.
Preparing The Water Storage Cylinder
Get a 4″ long PVC pipe then glue a small piece of acetate, this let's you see if the flashlight still has water.Fill Her Up!
Just fill in tap water and you are ready to go!
Attention: Tap water won't last for more than 30 mins. They lack electrolytes. Saltwater will boost to the flashlight's glowing time but still it would only last for 2 hours. Vinegar & Gatorade works best, since they both contain electrolytes (lots of them).
Even if you used this water powered battery as a backup light source for use in an emergency or when you ran out of batteries, it is still one of those items that it would be good to have around – just in case!
Plus, because this technology can be used with other battery powered electronics, learning how to do it could pay off in other ways!
To learn more about the water powered flashlight, please visit Instructables.
Paul Newsome