These painting tips will make all the difference when you renovate your home. If you want that professional look with out spending those hard earned dollars, check these tips out! You won't believe how easy they are.
1 Sand Away Flaws
You have to start with a perfectly smooth surface to end up with perfectly painted walls or woodwork. One pro tells PM that sander would be a more fitting job title than painter since he spends so much time pushing sandpaper. Sanding levels outs spackle or joint-compound patches and flattens ridges around nail holes. Sanding also removes burrs and rough spots in your trim.
Sand the walls from the baseboard to the ceiling with fine grit sanding paper on a sanding pole. Then sand horizontally along the baseboard and ceiling. Don’t put a lot of pressure on the sanding pole or the head can flip over and damage the wall. Sand woodwork with a sanding sponge to get into crevices.
2 Use Tinted Primer
Before the pros paint walls, they fill holes and patch cracks with joint compound. But if you paint directly over it, the compound will suck the moisture out of the paint, giving it a flat, dull look (a problem called “flashing”). Those spots will look noticeably different than the rest of the wall. To avoid that, pros prime the walls before painting.
Instead of using white primer, pros usually have it tinted gray or a color that’s similar to the finish paint. Tinted primer does a better job of covering the existing paint color than plain primer, so your finish coat will be more vibrant and may require fewer coats. This is especially true with colors like red or orange, which could require three or more coats without a primer.
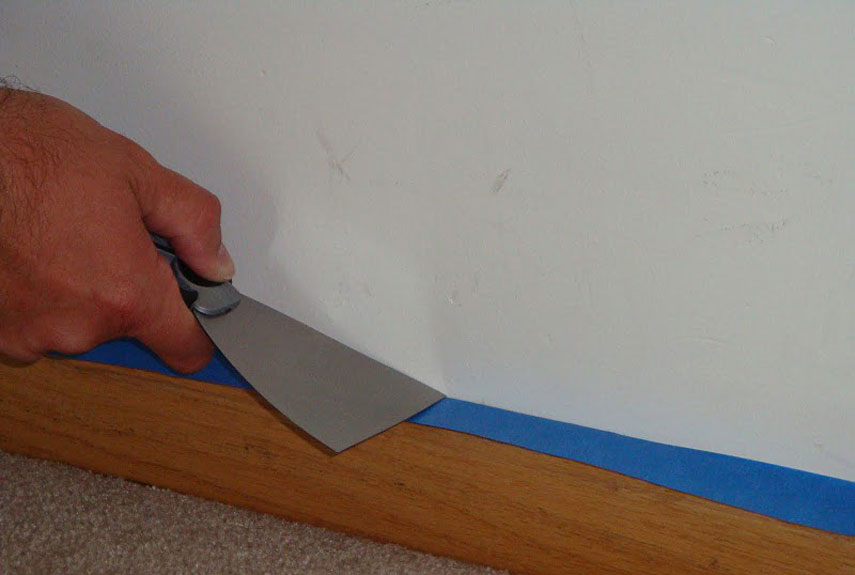
3 Press Tape With a Putty Knife
Nothing is more discouraging when you’ve finished painting than to peel tape off the woodwork and discover the paint bled through. To avoid the pain-in-the-neck chore of scraping off the paint, do a thorough job of adhering the tape before you start. “Apply tape over the wood, then run a putty knife over the top to press down the tape for a good seal,” a painter with more than 16 years of experience says. “That’ll stop any paint bleeds.”
Use the blue painter’s tape instead of masking tape. Masking tape can leave behind a sticky residue that’s hard to clean off. Plus, paint can cause the tape to buckle or get wavy, which lets paint run underneath it. Painter’s tape can be left on for days (some up to two weeks) and still peel off cleanly. And it stops paint bleed without buckling.
4 Eliminate Brush and Lap Marks With Paint Extender
The secret to a finish that’s free of lap and brush marks is mixing a paint extender (also called a paint conditioner), such as Floetrol, into the paint. This does two things. First, it slows down the paint drying time, giving you a longer window to overlap just-painted areas without getting ugly lap marks that happen when you paint over dried paint and darken the color. Second, paint extender levels out the paint so brush strokes are virtually eliminated (or at least much less obvious). Pros use extenders when painting drywall, woodwork, cabinets and doors. Manufacturer’s directions tell you how much extender to add per gallon of paint.
These tips will really give your home renovation project a sense of professionalism. Not only will your paint job look more cleaned up, it will also last much longer. Are you ready to start your home renovation project?
For more paint job tips, be sure to check out Popular Mechanics.
Featured Image via Popular Mechanics

Elina Chrystal