Sometimes a survival shelter can be challenging to get just right. There are so many factors involved – such as sturdiness, finding the correct elements, and making sure it holds up.
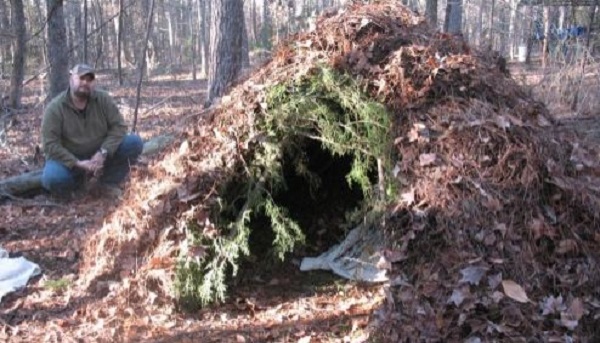
This shelter is called the spider shelter for a reason. This debris shelter is very insulated and it's made to withstand the elements – let's learn how to make it!
Before you do anything else, look for the right location. You want to build your shelter where raw materials are readily available. You will need an assortment of sticks of varying lengths, and you will need a lot of branches or pine boughs. You will also need piles of leaves, pine needles, or grasses.
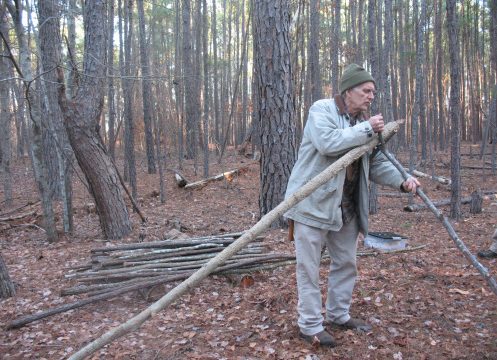
Another thing to look for is a tree with a strong, low lying limb, or a tree with a fork that is three or four feet off of the ground. This tree will support the ridgepole of your shelter. If you find a good location, but it doesn’t have a tree to support your ridgepole; you can use two forked sticks and lock them together to support the ridgepole.
When you have the main poles up, it is time to gather materials bedding materials. For bedding you will use the driest and cleanest leaves, needle, or grasses that you can find. They need to be dead.
Make a pile of leaves or needles that is about four feet wide by seven or eight feet long. Pile the bedding up about two feet thick then lay down on the pile to compress it. After compressing the leaves if you’re not at least six inches off the ground, add more bedding.
Now if you have a sheet, a blanket, or a solar emergency blanket, fold it in half lengthwise and lay it down on top of your bedding.
When your blanket is in place, pile another two feet of leaves or needles on top of it.
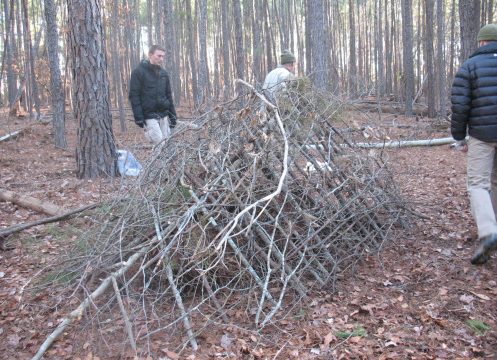
Next you will need to lay a bunch of shorter poles up on the ridge pole. These “ribs” should come out at about a forty-five degree angle and should be about six to eight inches apart. Leave an opening on the high end of the shelter so that you will have a door to crawl inside.
Now you can gather piles and piles of pine needles, leaves, and grasses and pile them up on the outside of the shelter. You want this layer to be about two feet thick or more.
If you are expecting high winds you may want to add another layer of ribs over the top of the debris to keep it from blowing off.

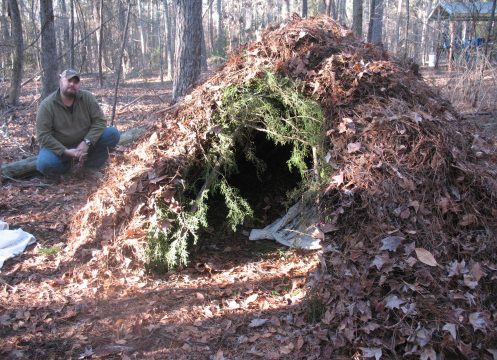
Yes, it's as simple as that! Follow these steps and achieve an excellent shelter that'll help you learn the skills necessary to survive a survival scenario. Just don't forget to weigh down the debris with small rocks and twigs at the end so that nothing will blow away.
As for the debris itself, any small and loose materials will do the trick. That's why it's important to look for dry leaves, twigs, and small branches. For more detailed instructions on how to make a survival brush shelter, aka a spider shelter, check out Sensible Survival.
Featured image and content images via Sensible Survival
Interesting post so much really good more on survival gear please
#nonextbuttons..