The equipment you need for your Emergency Bread is a mixing bowl and spoon, rolling pin and frying pan.
It takes about 40 minutes to make from start to finish and yields about 8 – 10 pieces of flatbread.
Ingredients for Flat Bread
• 2 Cups of Flour – I use fresh-ground whole wheat flour for this batch. You can use a mixture of white and whole wheat, just plain white, or just plain whole wheat. Just don’t use a self-rising flour as no leavening agent is required.
• ½ tsp of Salt – I prefer using a moderately fine grind sea salt, but plain table salt will work fine.
• ¼ – ½ Cup of Water – I used just over a quarter cup as my wheat was fresh ground. If you are using pre-ground, or stored flour, it may need a bit more water. If you dump in the water in its entirety, you may need extra flour. I prefer adding the water a little bit at a time.
How to Make Emergency Flat Bread
Time Needed: 40 minutes (10 min prep, 15 min rest, 15 min cooking)
Step 1 – Dump most of your flour into your mixing bowl. Keep a small amount aside to use when rolling out the dough. or grab extra flour when you reach that step.
Step 2 – Add a small amount of water and stir. Then add a bit more and stir. Continue until your flour takes on a crumbly appearance, or starts to clump together. This was reached with ¼ cup of water for me.
Step 3 – Using your hands, knead the dough against the bottom of the bowl until it feels smooth and elastic (3-5 minutes). At this point, all the flour should be absorbed into the dough, and there should be no residual stickiness. If the dough feels sticky, add a bit more flour and continue kneading.
Step 4 – Cover your ball of dough and let it rest for 15-30 minutes. This permits the gluten to relax, which will make rolling out the dough easier and enable you to roll the dough quite thin.
Step 5 – Start heating your cooking pan.
Step 6 – Divide your dough into walnut sized lumps, or slightly smaller. With two cups of flour, you should get 8 – 10 dough pieces.
Step 7 – Using your rolling pin, roll out the dough until it is as thin as you can make it.
Step 8 – Check the temperature on your frying pan, it should be hot enough to make a drop of water dance when dropped on it. When your pan is up to temperature, flip your first tortilla onto it and start rolling the second one.
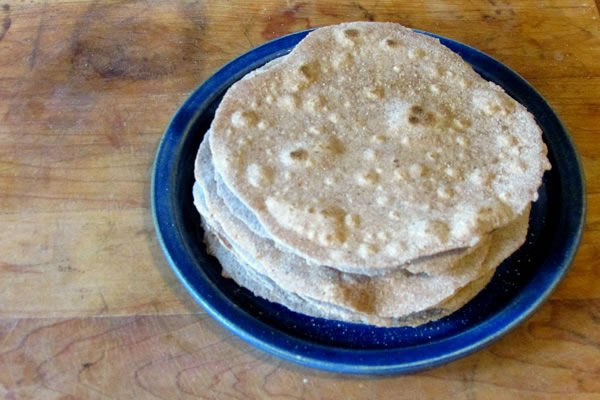
Step 9 – After placing the chapatti on the frying pan, keep a close eye on it. When the edges start to curl up or appear dry, flip it. When the second side starts to bubble, flip it again. At this point, bubbles should start forming and the bread will “roil.” When it slows, flip it and more bubbles should appear. With the correct heat, the bubbles can all join into one massive “pita pocket” bubble. The more bubbles, the lighter your bread will be.
Emergency Flatbread is a great source of bread if you are facing an emergency situation where time and supplies are limited.
If you have the time and supplies, you can also add ingredients to the bread to enhance its nutritious qualities.
For more information on this recipe and other survival recipes and tips, please visit the Urban Survival Site.
Featured image via Urban Survival Site.