If you find yourself in a survival situation, your knife is the one tool that is truly indispensable.
Keeping your knife in good shape is paramount to being able to do the thing you need to do to improve your chances of survival.
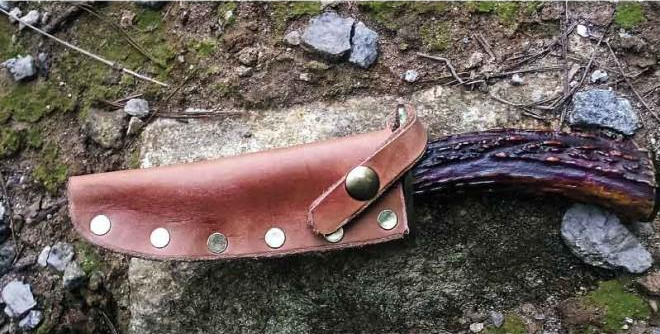
This easy-to-make sheath is one way you can ensure your knife is in top condition when you need it!
Make a paper pattern or draw on the rough side of the leather. Lay the knife down and trace around it.
Now lay it on its opposite side, facing the other direction, with 1/2 to 3/4 inches separating the two tracings. Mark off half an inch in front of the edge of both sides so you will have room to close the scabbard with the rivets.
Make a second 1/2-inch strip in front of the blade, and cut it completely out to form a stitch guard to keep the blade edge away from the rivets and to further stiffen the scabbard.
Belt Loop & Safety Strap
Within the width of the blade, mark out a strip above the body of the scabbard to form the belt loop.
The safety strap is next. It should angle sharply over the guard in line with the future location of its snap fastener.
The leather now must be folded, and this means wetting it thoroughly so it will take a set when it dries. Fold the two halves evenly together and work them together tight with finger pressure.
Quick Assembly
The belt loops must be riveted down using short gilt leather rivets. Punch two holes at the base of the belt loop. Mark the spot on the back of the scabbard when the belt loop is put in place so you can punch the corresponding two holes in the scabbard body. Put the rivets with the hollow base on the outside of the scabbard with the smooth heads on the inside of the scabbard. Flatten them down with a hammer.
Now punch a hole for the snap in the front of the scabbard and put on the bottom snap.Glue the stitch guard in place on one side and let it dry. When the first side is dry, glue the other side down and let it dry completely.
Take a ruler and lay out dots along the scabbard edge for the rivets. These should be 1 inch apart and a ¼-inch from the edge of the scabbard.
Insert the rivets from the back side so the hollow base is on the back of the scabbard and take a hammer and flatten them down. You should have long gilt leather rivets for this job but not extra-long rivets.
Final Fitting
Put the knife in the scabbard. Stretch the safety strap tight over the guard and press it hard against the snap on the scabbard body. Take your punch and punch out the center so you can insert the top snap. Because of its rounded head, it requires a small cup-shaped anvil to rest in when hammering its rivet.
Waxing is next. Get two pans and some Gulf Parrafin. Once it is all melted, immerse the scabbard. Use spoons to make sure that the belt loop is pulled away from the scabbard body so that the wax can get everywhere.Take the scabbard out of the leather, pouring the wax inside the scabbard back into the pan as you go. Quickly wipe the scabbard dry with paper towels before the wax cools and hardens.
Insert the blade in the scabbard and close the snap while everything is still hot. Mold the scabbard to the blade with finger pressure, keeping the paper towel between you and the hot scabbard.
Taking good care of your knife is critical to improving your survival chances. This leather sheath is ideal for keeping your knife save and on your person at all times.
To see some other alternatives to this sheath, please visit Real World Survivor.
A good sheath can keep your knife where you need it keep it sharp and turn a good knife into a family heirloom
These are awesome, @[1545556776:2048:Casey Williams]. Thanks for sharing the pic in our feed!
If you think my sheaths are nice you should see my holsters
@[620041297:2048:Craig Fox]. Maybe i can make ur sheaths!!!
Awesome idea
@[1475388972:2048:Eddie Diaz]