In this example, the person creating the can stove uses an oversized juice can – but any can you can cut can give you enough heat to cook all but the most complex meals.
The key to this type of stove is air flow, which makes being able to cut the material critical to your success.
Be Your Own Hobo
We're going to make the hobo stove seen here.
The license plate is optional, but something like that, even a folded piece of tinfoil, will be nice so you won't harm the surface under your stove.
This stove is tall and narrow, so you'll need to pound three sticks around it to support your pot, or put it between three rocks, or hang your pot over it.
Get the tallest can you can find.
You need height for convection to give you good airflow.
This coconut juice can is good. It's tall and the steel is pretty heavy for a drink can so it'll last a while.Food cans had lead solder in the joints until 1993, so don't use old cans.
Pineapple cans have zinc plating inside in case you think you need to breathe more zinc.Make the Initial Incision
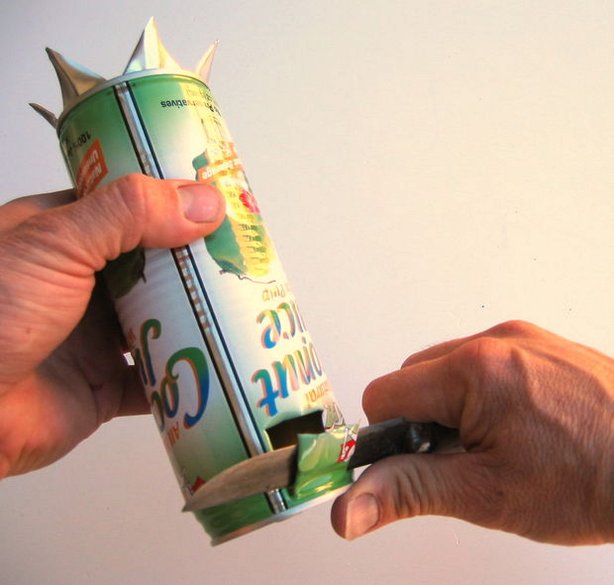
Cut an X or asterisk in the top of the can.
Warning from my Granddad: “Don't cut toward yourself and you won't get cut.”
These flaps are going to be the pot supports. The bottom on this can is heavier than the top, so I'm turning the can upside down to make them. Also the other end has the pry-tab open, and that makes it hard to make the pot supports turn out right.
Often you'll get a better result by opening the can by cutting the X instead of whatever the vendor intended.
Pry Up and Crease the Flaps
Pry up the flaps. Don't cut yourself on the sharp corners.
Crease each flap down the middle as seen in the second photo.
That makes them a lot stronger.
Cut Doors
Cut some drawbridge style doors in the sides near the bottom.
Those are the air intakes and stoking doors.
First Use
The first time you use it, wait for a while for the paint to burn off it. Stay back and don't breathe the fumes. Leave that for the youngsters who still enjoy the smell of burning plastic.
It's really easy to start a fire in one of these stoves. Start with whispy stuff or paper if you're still that close to civilization. Then work up to pencil sized stuff. Thumb thickness is probably the most you'll want for cooking. Thicker than that tends to smoke cuz you'll put in wet ones by accident.
You can toss it in the top before you put the pot on, and then poke them in under the pot.
You can feed longer sticks in gradually through the doors in Seminole star fire fashion.
It's so quick to start one of these, sometimes I'll pull over and do my cooking at a rest stop or by the side of the road. I'll put an aluminum license plate under the stove so I won't put a mark on the pavement. A folded piece of aluminum foil or a flat rock would be just as good.
I don't worry about hassles from authorities, because it's so easy to move the fire or put it out. But I've never been hassled. The rules about fires are usually about “open fires” and this isn't that.
Given you can find some sort of can virtually anywhere you go on this planet (shame on us!,) this type of “Hobo” stove is a fairly easy, quick way to get access to a stove.
The key is sturdiness and size (the taller the better for heat storage) and even in the most inhospitable weather conditions, you have a contained source of cooking heat, which makes eating safer and will improve your outlook on your situation!
For more information on this stove and others, please visit Instructables.
Featured Image via Instructables
If the power goes out you should already be prepared. Why else would you follow survivor pages
do u know any page where i can get more tricks like the one with the hose and nails to deal with b&e’s?