The combination of clay, silt and sand is referred to as “loam”. It is considered the ideal garden soil. Knowing your loam will help determine adjustments in fertilizing and water.
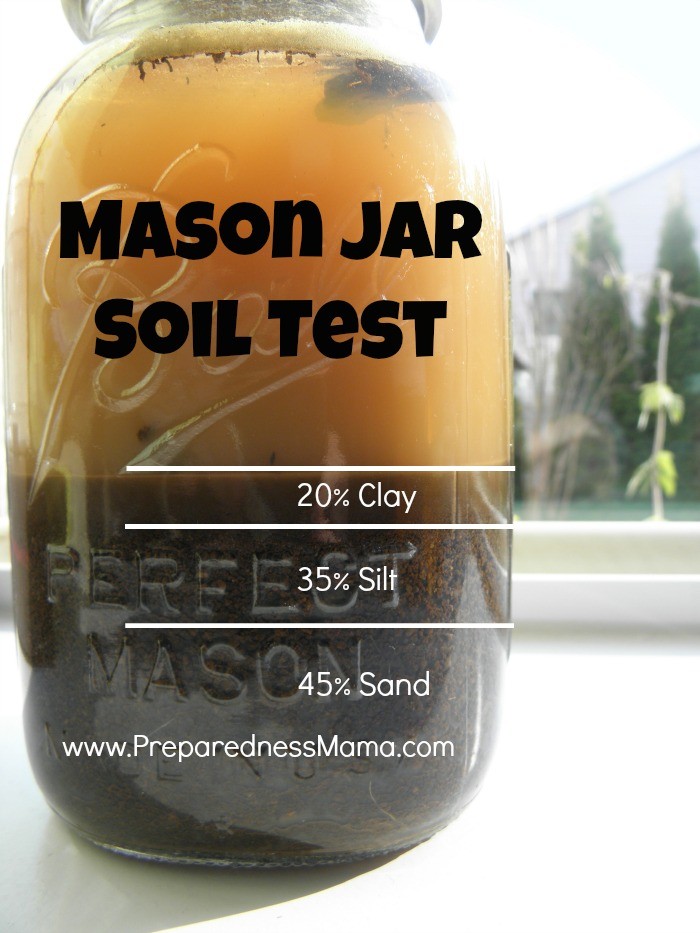
The Mason Jar Soil Test
1.Use a clear, clean, empty jar with a tight lid. A pint or quart Mason jar works fabulously.
2.Fill the jar about half full of garden soil. You can use soil from different areas of the garden to get an overall view, or make a test for each garden bed.
3.Fill the jar nearly to the top with water. Leave room for shaking.
4.Tighten the lid and shake the jar for several minutes so that all the particles are in suspension.
5.Set your mason jar soil test aside for several hours, so the particles have a chance to settle. They will separate into clay, silt, and sand layers.
Read the Results of your Mason Jar Soil Test:
The bottom layer will be the heavier particles, sand and rocks.
The next layer will be the silt particles.
Above that are the clay particles.Organic matter may be floating on the surface of the water.
The color of the soil gives a clue to its character – light colors usually have less organic content than dark soils and dark soil warms faster in the spring.
If your jar test is 20% clay, 40% Silt, 40% sand = Loam, you have the perfect combination. You’ve been working hard in your garden!
However, for soils with a different composition you might want to amend with a good compost heap, crop residue, leaves from deciduous trees and different kinds of fertilizer made just for the soil in your yard.
For more information please check out Preparedness Mama. Her explanations for all of the above in more detail and very interesting!
By the way, if your children are interested in science or have a project they need to get done for class this school year the mason jar spoil test is an ideal undertaking for them!