Look at these pictures! Wouldn’t you just love to do this astounding project?!
Shopping List:
4 – 2×2 @ 8 feet long 14 – 1×3 @ 8 feet long 7 – 1×2 @ 8 feet long 1 ¼” and 2” finish nails 2” screws Recommend also 2 ½” PH screws
Cut List:
FRAME 4 – 2×2 @ 41 ½” (legs) 16 – 1×3 @ 23 ½” (side drawer glides) 2 – 2×2 @ 41” (LP to SP, both ends cut at 60 degrees off square, ends parallel) 4 – 2×2 @ 20 ½” (longest points, one end cut at 60 degrees off square, other at 30 degrees off square, ends are cut in same direction but not parallel) 4 – 1×3 @ 25 ¼” (front/back supports) DRAWERS 14 – 1×2 @ 23 ½” 14 – 1×2 @ 20 ½” 49 – 1×3 @ 23 ½”
Step 1:
It is very important to make sure that the ends are built identical and square. The side rails will actually serve as drawer guides, so you will want to make sure the guides are attached square too. I recommend first taking all of your 2×2 legs and marking all of them at the same time with the side rail locations. Then you can attach. You can attach the siderails with 2” finish nails and glue.Step 2 Instructions:
Now the X braces will keep everything square. Some miter saws will cut a 60 degree angle, but if yours does not, you will need to mark the angle with a square or protractor and cut with a circular saw. Remember that the angle is 60 degrees OFF SQUARE, so this would mean 30 degrees from the edge of the board. Attach the cross braces to all siderails and legs.Step 3 Instructions:
Once both legs are done, all you have to do is add the front/back supports.Step 4 Instructions:
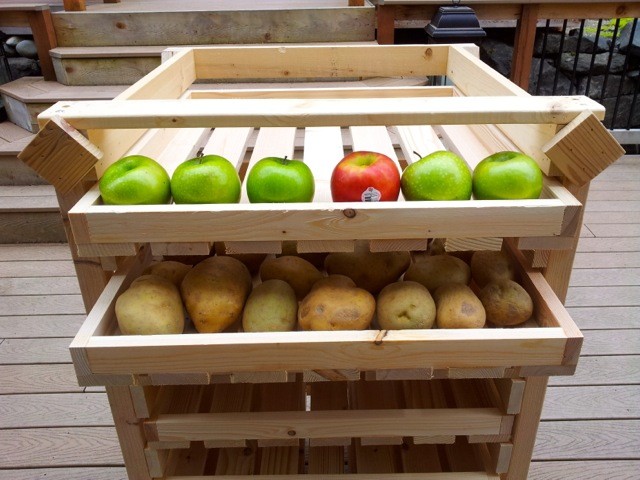
And then build trays. Trays must be built square to slide right.Step 5 Instructions:
And then slide the drawers in!

Wasn't that easy? Now all you need to do in order to finish up is add wood filler to any existing holes and sand everything down so it's nice and smooth. If you moisten a rag with water, you can wipe up any shavings or dust from the sanding.
To check out more graphics and how-to instruction please go on over to Ana White. Build it while you can and you too will have some grand vegetables and fruits all during the Fall and Winter seasons!
This makes for a wonderful DIY project so if you are in the mood to get your hands busy – we say go for it!