At a minimum, every survival kit should have several types of survival candles and if you are looking to save money (as well as learn a new skill,) you can make your own!
These cost about $2 each, which is pretty good if you compare them to those perfumed candles that gag you in card and house-ware stores; here is what you need and how to do it!
• Soy wax flakes. These are commonly used in making scented candles and are sold in craft stores or Amazon.
• Canning jars.
• Wicks and Tabs. You'll want your wicks to be a bit longer than your candle holder is tall.
The tools you will need are:
• Scissors: For cutting the wicks to size
• Double Boiler: For melting the wax. I don't have an actual double boiler, so I just get a large pot, fill it about 1/3 to 1/2 of the way with water, and then nest a slightly smaller pot inside.
• A Pouring Device: I just used a pyrex measuring cup.
• Protective Gloves: We'll be using boiling water and hot wax, so you want to keep you hands safe.
The steps are simple.
First, you'll want to get your wicks ready. If your wicks are way too long for your container, you'll want to trim them down to approximate size. I had 9″ wicks here. Insert the wick into the tab – I found it helpful to use my Leathman to “tighten” the mouth of the tab around the wick, but it's not a must. If you buy pre-tabbed wicks then you can skip this part.
Put your wicks in the jars. Don't worry if they're not centered – we'll fix that after we pour the wax. Now it's meltin' time!
Carefully transfer the melted wax into your pouring container. Then, pour away! Don't worry about the container – soy wax is all natural, non-toxic and cleans up fairly easily. Beware if you have a soy allergy, though.
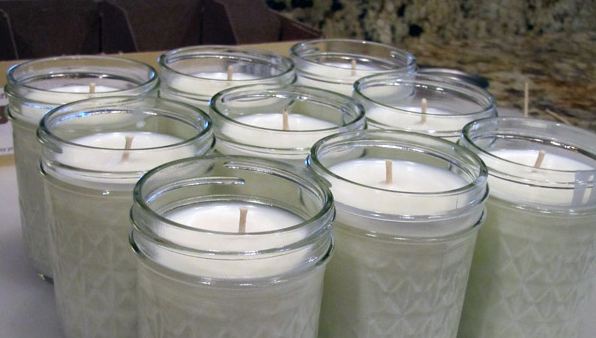
Don't fill the jar up the whole way – leave some room between the wax and the top of the container. You'll want to center the wicks at this point. Then, take a break and let the wax cool and harden up. Almost done!
Last step. After the wax has cooled, trim the wicks as needed–you want the wick to be about 1/4″ above the wax. Then, screw the lids on and you're ready for storage!
Pretty simple huh?
Generally, making this type of candle takes about an hour from start to finish, including getting set up and cleaning up.
One general rule is that you should have at a minimum two candles per room in your home.
You can also use different ingredients to scent your candles if your home to smell like one of those stores.
To learn more about candle-making and other survival skills, check out the TEOTWAWKI Blog.
Featured Image via TEOTWAWKI Blog