It’s not all about the world coming to an end. The situation can be something as regular but disastrous as an earthquake, tornado or hurricane. People will need to know you are all right and what they can do to help you and yours — and visa versa. With an extended range antenna, you can help them and help yourself!
The building steps are simple:
1. Print out the scaled Yagi antenna template.
2. Trim paper clips to size and glue them to the template.
3. Use Popsicle sticks to build the antenna’s backbone and hold it together.
Printing the Yagi Diagram
The antenna is longer than a Letter sized or A4 sized paper. So you have to print the template in two parts (labeled part1 and part2 in the zip file).
PRINTING:
Make sure to set your printer’s properties to ORIGINAL SIZE (not “best fit to page” ect..).
Set the print orientation to LANDSCAPE.
VERIFYING SCALE:
Use a ruler or caliper to measure if the print is of correct scale. You will notice vertical bars crossing the horizontal line. The vertical bars represent the Yagi “elements” which will be made from paperclips. The horizontal line is the backbone of the antenna which will be build out of popsicle sticks.
Cutting the Paper Clips and Fixing Them
You have to trim the paper clips with a nibbler or plier to fit the vertical bars (“elements”). This is fairly straight forward. Lay the paper clip on the template’s element and mark the ends with a marker. Snip at the marking.
Make sure that each element fits correctly the length of the bar on the diagram.
Fix the elements in place with crazy glue.
Leave element #2 for later. This is the element that connects to the electronics and is called “the driven element” (as in being driven by electronics).
Building the Backbone
The backbone holds the shape of the antenna. I just cut pieces of popsicle sticks and fit them between the gaps of the elements.
Start from element #15 backward. When you arrive to element #2 move on to the next step.
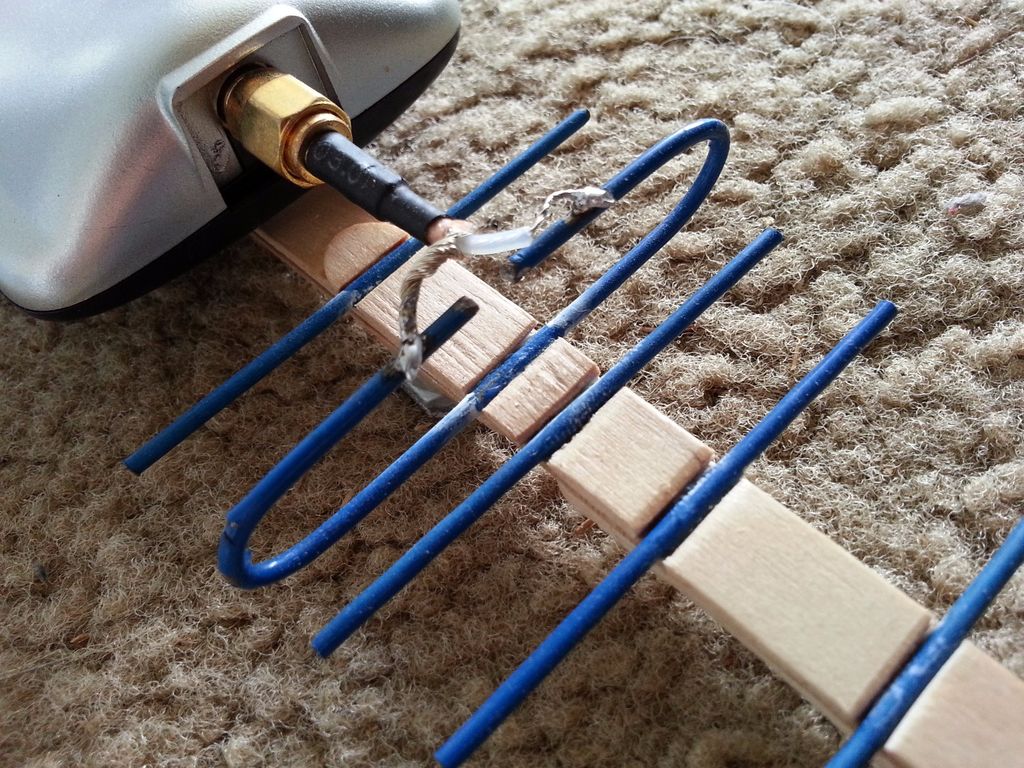
Building the Driven Element
The “driven element” in a Yagi antenna, is usually the second one from the start. It is the element that connects to the USB WIFI or 2.4 GHZ electronics.
It is a broken loop and not a straight wire. A loop of wire resonates at a specific radio frequency depending on its dimensions.
It just happens that its about the size of a common big paper clip. You need to clip the paperclip so that it loops around and meet in the center but the end not touching, leaving a gap (see photo).
Fix it in place with crazy glue and build the back bone around it.
When all the elements and sticks are in place, reinforce the antenna with another layer of popsicle sticks. Glue full lengthed popsicle sticks on top of the antenna. The antenna should become mechanically stiff.
Download the PDF HERE.
In under an hour you have a great antenna that will extend the range on any device, most especially your primary form of communication, and contact issues will be a thing of the past! What is more, it was done in under an hour!
While it is true we want to remain secure and safe in a world gone crazy, we cannot allow ourselves to live in a hole, without knowing what is going on in the outside world. Here is an excellent solution!
I gotta call bullshit on this. The coaxial shielding is connected to it like it is a circuit. This was obviously made by someone who does not understand how antennas work.
It is a circuit as it should be.
Because antennas are SO expensive. Way to stick it to the man by jury-rigging something that cost less than $50…
Kyle Dunaway can you make a few for ODS
Gary, antennas are not circuits. Stop embarrassing yourself.
Easy peezy!
Extending the range of a radio device, isn’t as simple as an antenna, at all. It may increase your sensitivity to reception…. But the only way to increase broadcast range, is to provide more power, and a stringer broadcast signal. No antenna is going to do that. You need amps, and signal repeaters.
Will this work for tv?
Cory Matthew Mellor
It’s a yagi directional, build it for the center of the band you want to use, it’s highly directional so you gotta aim it in the direction of the transceiver your wanting to communicate with.
Jessica Hay
I use a roll up Jpole and 50′ of coax. It all fits in my EDC bag. The antenna and coax maybe cost me $30.
Mike Gillard
Umm, J-pole is cheap, easy and omnidirectional (more or less).
http://www.iw5edi.com/ham-radio/?the-copper-cactus-antenna,94
http://radio.meteor.free.fr/us/antenna.html
http://bcbj.org/antennae/lte_yagi_diy.htm
Susan, you obviously think that your money can JUST buy anything. When the ship hots the fan, your $$ will be worthless and the stores will be empty. Why are you even on this page??
Yagi trap style antenna. However, this isn’t a good idea as a DIY project. There are too many factors invloved, Die Hard Survior.
Look up the GI trench radio, a simple project that can be made from everyday objects.
Most have been since the 80’s.