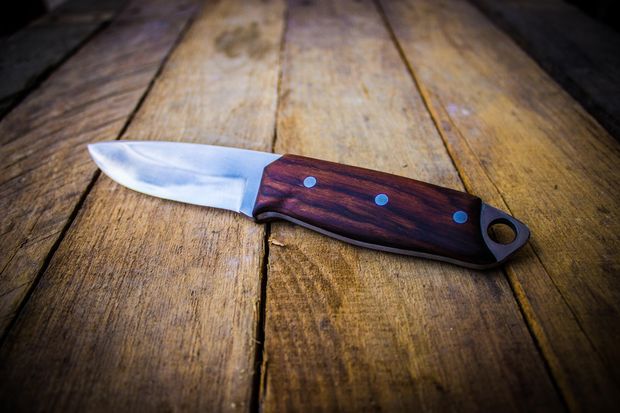
A good knife is two things: highly valued and hard to find. This isn't to say that most knives aren't quality knives; it just means finding the right knife for your needs can often be a struggle. But why spend countless hours looking when you could design and craft your own blade? Learn how below.
Step 1: Tools
Tools
-Angle grinder. Use a metal cutoff disc for the rough cutting. For the profiling of the blade use a backer plate with grinding sandpaper. Buy them in a few grits starting at 60 grit. Or you can just get a few flap discs.
– Files.
– Sandpaper. Waterproof from 120-1000 grit.
– Clamps.
– Drill and steel drilling bits.
– Dremel.
– Grill for heat treating.
– Coping saw
Materials
– A piece of CRA 1095 steel from Admiral Steel 5/32″ X 1 1/4″ X 96″.
– Handle Material. Wood, bone, micarta or even horn.
– Pin Stock You can buy this online from knife making suppliers or just go to an Ace hardware and browse their brass or stainless steel bar stock.
– Epoxy 30 min. 2 ton.
– Linseed oil. Use this to finish the wood handle or you can put some polyurethane on it.
Step 2: Make a pattern
First draw two parallel lines on a piece of printer paper that represent the width of your blade steel. Mine is 1 1/4″. Design your knife in between these lines. Once you are satisfied with your design glue it on to a piece of 1/4″ ply and cut it out on a band saw or with a coping saw.
Step 3: Make some sparks
With your angle grinder and some cut off discs go to work cutting out your blades. Take your time and be safe.
Step 4: Shape Profile
Work all the edges you can keeping the grinder as flat as you can.
Step 5: Drill holes
With your hand drill or drill press (preferred) and your steel cutting drill bits, drill the holes for your pins. Put some extra holes in it if you want to skeletonize it at this time. this cuts down on the weight a bit. Drill smaller holes first and then enlarge with bigger bits. Use some oil to keep bits from overheating.
Step 6: Grind bevel
Before you start grinding mark a center line on the edge of the knife blade that shows you the center of your bevel. Using the angle grinder and the flap disc shape the bevel. Don't shape to a fine point yet but leave the blade edge about 1/32″ thick.
Step 7: File Bevel
Using a rough file continue to shape your bevel then switch to a fine file. Still leave the edge about 1/32″ thick. Once your bevel is shaped then use waterproof/automotive sandpaper to start to smooth out the file marks on the blade and anywhere it will be exposed. Start with 80 grit and move up to 120 then 180 then 220.
Step 8: Heat Treat
You can use a small grill and some hardwood charcoal to heat treat your blade. Fan the fire and get the coals superhot.
Put the blade right in the hottest part of the coals once you have it going strong. Let it get bright orange (critical) non-magnetic. Immediately dunk it in some oil to cool it.
To take some of the brittleness out of the blade you need to temper the blade. Just stick it in the oven on the middle rack at 350 degrees for an hour. After an hour just turn off the heat and let it cool in the oven. Repeat.
Step 9: Remove Scale
You need to sharpen the blade edge as this was left a little thick in a previous step. Get out your files and sandpaper again and file and polish that baby up.
Step 10: Shape Scales
Clamp the blade to one of the scales and drill the pin holes. Finish any of the edges that will be tight against the blade and won't be able to be sanded later.
Step 11: Epoxy Scales
Put the pins in one of the scales and epoxy it. Slide the knife onto the pins and then epoxy the other side and pop the other scale on. Put a bunch of clamps on and let it sit overnight.
Step 12: Finish Handle
Once your epoxy is set take off the clamps and shape your handle. You can use a rasp, sandpaper and a dremel with a sanding drum attachment. Once it is fully sanded rub some linseed oil on it and let it dry in the sun.
A knife that you made yourself is much more likely to be highly valued by both you and whomever, you may gift it to.
Being able to construct a blade from start to finish is a true mark of skill, and many people who know you have this skill will begin coming to you to look to fill their knife supply needs. This makes it a highly marketable skill and greatly worth your time in learning.
So put down that catalogue and pick up your tools, because after you've started making your own knives, you'll never buy another blade again.
You can read the entire original article and see the step-by-step process on Instructables.

With the same amount of effort and a little more knowledge, a beginner can make a high quality knife that won’t disappoint. Unfortunately, following these directions won’t get them there.