You've got the materials, the layout and now you're reading for the handle. Below you'll see how to create this specific handle for your project.
Step 3: Creating your salmon bar knot handle
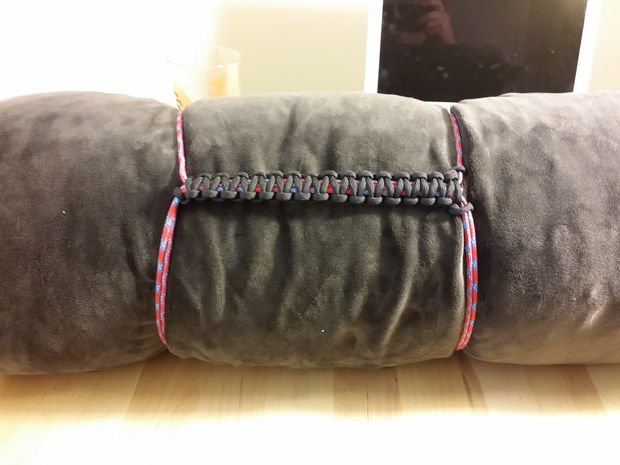
The Salmon Bar Knot is the fist of the two knots that you will be using and is super simple. I like to start on the loop only (2 strands of cord) before I incorporate the 3rd open end strand to give some directional separation from the two strands.
1. The fist knot – Like I said, I like to start around the two strands that go to the loop, this is just a simple overhand knot.
2. The second part of the Salmon Bar is just another overhand knot that is reversed.
3. Once you make the 3rd knot you will start to see the handle take form.
4. After the hangar is in place you continue the knot all the way up to the middle of the hangar.
5. Once you are at the middle of the hangar you want to take the open end string from the opposing side and pull it up and over the hangar pieces.
6. If your loops are not exactly even at this point don't worry, they will still have some play. Follow the strand through the handle and you will be able to pull the excess to one side until the loops are even. It may seem like it is too tight to pull through at first, but trust me if you pull hard enough it will go through!

On the next page we'll show you Step 4 and Step 5 (the final step) for completing this project. Don't give up now!