Sure, staying cool usually falls under the heading of a luxury, rather than a survival necessity, but in the some situations, managing a comfortable temperature in your dwelling can be a huge morale-booster. It also helps promote better, more restful sleep and, heck, building a unit like this is also a lot of fun. Don't expect miracles, though. This type of cooling works best on hot, dry air, so if you are in a high-humidity situation, you'll need a different alternative. Obviously you'll also need a power source, but this versatile method will work with an A/C fan or one that runs on direct current, so you can use battery power stored from wind, water, solar, or whatever you have available.
As mentioned, this evaporative cooler works best in drier air. That's because the warm dry air is better at evaporating the moisture flowing through the cooler. That evaporation process uses up lots of the air's heat energy, leaving some nice, cool, moist air.
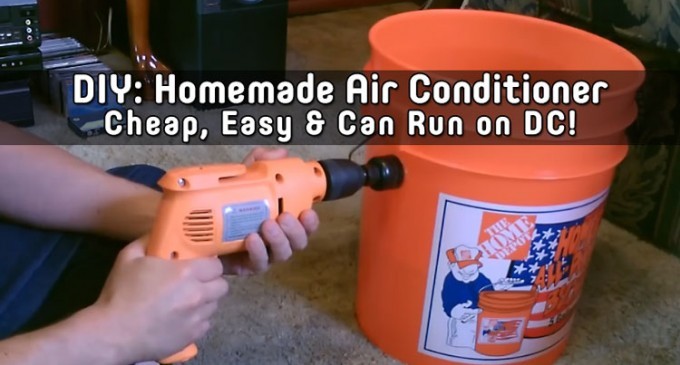
STEP 1: GATHER THE PARTS
To get started, you'll need to gather these commonly available, inexpensive parts. You don't need anything fancy or expensive and chances are you have some of these tools and materials already. If not, you'll find what you need at a hardware store locally or on Amazon.

Here's a list of the parts and tools you will need:
- 5-gallon plastic bucket with a lid; you can find one at a Home Depot or a similar hardware or building supply store
- Drill with a ‘hole saw’ type bit. Any common electric drill should work just fine. You can get an inexpensive hole saw set at any hardware store or Home Depot. Since you'll only be cutting plastic you don’t need anything fancy. Both 1.5 inch and 2 inch drills are good sizes to have for this.
- Evaporative cooler pad that is at least 14×31 inches. Dura Cool makes some that are available from Amazon. You can also find them at Home Depot or another hardware store.
- Utility scissors or shears that will be used to cut the pad to size
- Long straight-edge ruler that'll help you cut accurately
- Permanent marker or tape to indicate the maximum water level
- Fiberglass screen as used for windows or screen doors or a garden cloth will also work
- Sturdy utility knife
- Small DC powered fan
- Submersible aquarium or fountain pump (look for a 12 V DC submersible water pump on Amazon)
- About 4.5 feet of aquarium tubing to fit your pump (usually 1/4 inch or 5/16 inch clear vinyl is fine)
- Small clamp that'll be used to pinch the hose
- Have a thumbtack ready
Once you have the parts and tools gathered, the rest is easy. We'll get into the step-by-step specifics after the break and there's even a video to show you exactly how it all goes together, along with a demonstration of the finished cooler.


Agreed, this is a swamp cooler
Do you own a freezer?
18to24 hours
Yes but not much room in it but maybe could fit two ice trays a time and feel I need more than I could supply…